Monday, December 30, 2013

SD cards – Speed versus cost …

First off, what does the “X” rating mean? And how does it line up with the “MB/s” when used instead? Well, I’ll let Lexar answer that …

image
http://www.lexar.com/content/what-does-100x-200x-400x-and-600x-1x150kbs-performance-mean

So a 100x card is quite slow by today’s standards, although it is certainly fast enough for most people and most purposes. The problem, though, is that it often costs much more than faster and better cards. This is simply related to volume differences …

So what kind of value equation can you get from these boxing day sales? Well, it’s a tough call, but you should be able to spend less than $1 per GB these days and still get a pretty fast card.

So let’s look at Future Shop’s current sale on 32GB cards … I am personally interested in this size as they can be had for very reasonable prices these days … but the question is whether they are fast enough?

I’ll cut your wondering short and suggest that 200x -- 30MB/s cards go on sale regularly for great prices as low as 20 bucks, and that’s basically a steal. I used to be happy to get two such cards for at 16GB size for 50 bucks. And that was only a couple of years ago.

So here is what I would buy, annotated from the Future Shop web site … I’ve applied a green circle to those that are a decent value for performance versus size versus cost. The Lexar 32GB and 64GB cards are a steal. The rest are still a good value if you happen to prefer certain brands.

image

Note that, should you desire really high performance for high bit rate video (for example with hacked Panasonic m4/3 bodies), then you might consider adding a few bucks and grabbing the 45MB/s or 80MB/s cards. They are not as good a value if you are just shooting normal stuff, but if you invest in fast USB 3 card readers and / or shoot high bit rate video then suddenly  they are a very good value.

Saturday, December 28, 2013

Smuckers Blueberry Jams – No Sugar Added versus Sugar Free, is one better than the other?

I discovered this excellent jam from Smuckers – Wild Blueberry No Sugar Added. This is a very tasty jam with real blueberries in it and 20 calories per tablespoon. So adding that to a couple of slices of toast generally adds 40 or 50 calories to a snack or meal.

Then I went on a shopping tour to Watertown New York and found the American version of this jam – Sugar Free Blueberry Preserves. This has half the calories and no sugars. Same number of carbohydrates at 5g per tablespoon, and it actually contains a couple of grams of fiber per tablespoon. So if it tastes any good, it is a much better food for one than the no sugar added version.

Here is what they look like side by side. Since I am testing the XQ1 and shot these hand held (braced) at 100 ISO in really ugly low light, I think it is interesting to show the color corrected JPEG followed by the RAW. Just for your interest.

DSCF9366_XQ1_24.2 mm_ISO 100_0.6 sec at f - 4.9

DSCF9366_XQ1_24.2 mm_ISO 100_0.6 sec at f - 4.9-2

DSCF9367_XQ1_24.2 mm_ISO 100_0.6 sec at f - 4.9

DSCF9367_XQ1_24.2 mm_ISO 100_0.6 sec at f - 4.9-2

So one notable thing is that the Canadian version has blueberries as its first ingredient. This is a good thing, generally :-)

The American version has water, followed by polydextrose and maltodextrin and then coming in a distant fourth place is blueberries. Hmmm …. since this is by weight, having two chemicals beat blueberries is a matter for some concern.

But pretending that we did not notice this, how do these taste?

Well … it is not much of a contest.

The Canadian no sugar added version has the taste and texture of blueberry pie filling. And for those who love blueberry pie, this is a revelation. Low calories, controlled amounts of sugar, and the taste of pie. Mmm, mm, mmmmmmm :-)

On the other hand, the American version has the texture of liquid rubber / paste and about the same taste, with the a hint of that sickly semisweet fake blueberry taste that you get in “blueberry drink” beverages. To say that my toast was disgusting is to totally underestimate what I am trying to tell you.

And I ate it twice on two slices each time – slathered to coat the peanut butter layer for maximum effect – before pronouncing it dead. But dead it is …

I hated throwing away two full jars of this stuff, but I would not even give it away as it does not taste like food anyway. Last night I noticed a sale on the wild blueberry version and bought three more jars. Whew!

So in a simple twist of fate, I suggest that Americans consider shopping for their low calorie blueberry jams in Canada. Because there really is no contest whatsoever.

Sensor Sizes – How much difference in image quality between full frame, APS-C and four thirds?

This comes up now and again on the various forums, most notably on the micro-4/3 forum on DPReview, no doubt because that forum suffers more sensor-envy than any other. This comes from a lack of understanding of how much difference really exists in physical area – the single most important factor where image quality is concerned.

This happens to be a law of physics, and until it is repealed, doubling the area of a sensor will generally improve the quality of the result by one stop, at least where noise is concerned. This, in turn, tends to be associate with a similar improvement in dynamic range, since dynamic range is itself inexplicably tied to noise floor. Of course, I am over-simplifying by quite a lot, but then I think at this level anyway :-)

The point is that sensor size matters. And here are the sensors sizes compared. The actual width of the field of view is full frame, with the lines inside being Nikon APS-C, then Canon APS-C, then 4/3.

sensor_sizes
 
Now that is kind of interesting, as the difference from full frame is rather dramatic but the difference between the APS-C and 4/3 sensors is rather small. In fact, the majority of the sensor size difference is in the width.

Why is this? Well, the traditional “35mm” film camera shot a 2:3 width to height ratio as that is simply how the film SLR was designed. We all got used to it and so we carried it forward into digital for dSLRs. This is a terrific ratio for landscapes, since it gives a sense of width, but it is rather unpleasant for portraits, since a 4:5 ratio is far more comfortable for a head and shoulders portrait, thus rendering the 8x10 as a favourite portrait size.

And so we should really compared 4:5 cropped sensor sizes to get a gist for how they will differ in real life (portraits, weddings, etc.) Is there a lot of difference in noise?

sensor_sizes_8x10_cropped
 
Now that is rather a bit closer in size. The full frame is still much larger, but the three smaller sensors are clustered quite closely together in relative terms.

Perhaps it is time therefore for some hard numbers.

image
 
And there we have it. On a typical portrait, the difference in noise between a cropped Canon APS-C and a 4/3 sensor is going to be about a third of a stop. This is often less than the difference in behavior between meters, thus rendering the noise difference under the control of the photographer. For example, it is possible to set +1/3 stops for all images shot on the 4/3 sensor, rendering the total amount of light in the image identical. Thus, the noise is as well. (Again, slightly over-simplified but you get my drift.)

So this is why my various “battle of the sensor sizes” articles always tend to show a big gulf from full frame to APS-C and then essentially no gulf to 4/3. In fact, 4/3 tends to have superior technology to the Canon and Sony NEX cameras, thus rendering image processed from raw of higher general quality with micro 4/3 over these others. Nikon tends to be pretty even with m4/3.

Now, I am not saying that you can get equally good images from m4/3 in all circumstances. In fact, dSLRs retain some significant advantages – AF speed (diminishing, but still there), OVF (always a huge advantage for certain types of photography), sheer performance of the capture subsystem, ergonomics for many people, and so on. But if you think you will get better images just because the sensor looks bigger, then think again.

Wednesday, December 25, 2013

Fuji XQ1 Review – Part 10 – Purple Heat Syndrome

For those who have read some of my other reviews, you will remember that every EXR CMIOS sensor (CMOS started with the F550EXR) has had a serious issue with recording heat. You get purple instead of yellow or red.

So I thought it might be an idea to test the XQ1 and see how it fares with heat. The element on my stove served the purpose today, as it did when I tested the F800EXR, which really purpled things up :-)

My first image caused me a huge amount of concern, as it looks like this at 0EV, this being the OOC JPEG:

After knocking the RAF’s exposure way down, I arrived at a decent rendering …

So I videoed the element going on and off for a while and it came out red, which you will see in a moment. I took a still while the video was recording and here is what the camera does at 0EV in video:

That is red enough in my opinion.

So what is going on? I speculate a bit in the video, but the bottom line is that I don’t know. Here is what I do know:

  • The camera is very responsive to the +2 and –2 stop range for compensation in normal light. But it is unresponsive when shooting the heat source. It looks the same throughout the range.
  • The camera can capture the heat source correctly, indicating that there is either a difference in how the video is read from the sensor, or that the natural exposure is very low. I know the latter to be untrue in good light, but I have not yet tested the low light chops, a traditional Fuji weakness. Soon.

So I am stuck for an explanation. Purple Heat Syndrome seems to be no issue for the X=Trans sensor. But there are peculiarities that make no sense when comparing PASM images with video stills.

Anyway, the video showing all of this with commentary …

Fuji XQ1 Review – Part 9 – Video Mode with Exposure Compensation

Well, the XQ1 has some nice features in video mode.

  • Compensation works great from –2 to +2 and the camera shows you the setting in effect down the far left side. This is an extremely effective feature and vastly better than any of the EXR cameras could manage.
  • AF tracks pretty well when zooming. Hunting is not bad in good light, but is prevalent in low light unfortunately.
  • AF is very fast in good light, which is no doubt a hybrid AF thing.
  • 60p seems pretty smooth at times.

And many things I really dislike …

  • Automated exposure mode only.
  • No flicker prevention to fix the shutter speed to 1/50, 1/60, 1/110, 1/120.
  • Stepping of exposure is far too obvious – the steps come too frequently and they are too dramatic. Contrast with Panasonic bodies, where they try to wait and do it all at once and then do it smoothly.
  • The 60p when slowed down does not really look smooth as it does when you have full control of exposure. This is obvious when you see the birds flying at .25x speed. Half the time you see a split bird and that should not happen.

All in all, you will get better video with this camera than you would with any of the F series. But you cannot use this in anything but the most informal capacity. The amount of control is just too low. I would choose any Panasonic m4/3 body (and many are cheaper than this camera) for video over this one.

So Fuji have improved video greatly, but not enough to make it really useful. For shooting your kids, it is fine I think. The fast lens really helps, too. The audio is pretty good too, so I think it serves that purpose quite adequately, and far better than the F series has done in years.

Rogers and Samsung and Jelly Bean 4.3 – Incompetence underscored … perhaps taken to the level of fine art … *** UPDATED ***

If you have not yet allowed your Samsung S3 to upgrade to Jelly Bean 4.3, DON’T!!!!!  My absolutely brilliant phone under Jelly Bean 4.2.2 is now a broken piece of ****.

UPDATE: I finally found a solution. I bought Helium (which used to be called Carbon) backup and backed up everything from my phone. I then did a hard reset and wiped everything. Once it came back Google restored the apps automatically and then I had Helium restore the settings. Sure enough, everything works again. But be aware, not everything comes back exactly as before. But it is mostly the same and now I have the features of Jellybean 4.3 …

Samsung have been plagued by complaints from all over the world for almost two months now, and frankly I do not see things getting better.

My main problems were (both are now working):

  • Phone will not ring. (This is kind of big.)
  • Battery dies in hours if I switch WiFi on. (I can live without it, but it is inconvenient.)

Tuesday, December 24, 2013

Fuji XQ1 Review – Part 8 – AF Issues … minor, but definitely there …

A few days ago, one of the minor review sites was linked from the Fuji Talk Forum and a discussion broke out about their rather harsh indictment of the XQ1’s AF. They said that it missed focus all the time, thus rendering a good camera unreliable (I’m paraphrasing.)

I commented that I had not seen that in my hundreds of images so far, and I hadn’t. But I had been in well lit scenes and I instinctively go for contrasty subjects. I am also comfortable with focus and reframe as a technique.

So today, I decided to play with the camera and scanned around a dark room for a while, trying to focus on items I saw. A patch on a wall, a canvas surface, a nylon camera bag. Whenever I pointed at a surface, even one with features like a seam, the camera failed. Even with the AF illuminator on, it failed and failed in AFS mode. I had to find a spot that had real contrast (not just a feature with subtle contrast) and then it focused just fine.

Contrast that to the F770EXR. It focused on everything in the room with no effort. And faster to boot. The AF illuminator is brighter, but that’s not the whole story. You can hear the focus mechanism at work and it is simply faster and more accurate.

My final test was to switch AF modes from single to multi. In Multi mode, the camera searches for a feature near the center of the frame on which it knows it can focus. And that worked just fine. It found a feature that worked 9 times out of 10. And interestingly, sometimes it chose a surface that it had failed to focus on in AFS mode but snapped into focus with no issues in AF Multi mode. Go figure …

I’ve often thought that Fuji’s firmware team was inferior in a lot of ways. They manage to make their excellent EXR cameras extremely difficult to operate without guidance (which I have provided here in lieu of simple menus.) But more importantly, the different lines of compact cameras have very different capabilities and features. While the XQ1 has brilliant menus for tweaking settings (every setting can be tweaked so JPEG becomes very viable as an output format), it seems that the firmware guys did a mediocre job of the AF system when they had an excellent AF system available from the F series. This is unacceptable and if I ran that team I would be pushing them to always build using their best algorithms.

Anyway … the issue is real, but is easily worked around. In walkabout scenarios, I never see it. But when in low light, you do have to be careful to use focus reframe if you want to shoot AFS, or just switch to AF Multi and allow the camera to pick something to focus on.

Monday, December 23, 2013

Test Post from Word 2013

The word (pun intended) just came out that we can now blog from Microsoft Word. A bug was apparently found (finally!) and added to the December fix pack. And sure enough, it took me one second to register the blog and I am about to post this …

So thank you Microsoft!

I am MIXER MAN!

Caught a nice sale on a Kitchen Aid stand mixer for half price. There are a few places selling them this Christmas at these prices, but I chose Amazon.ca …

It was delivered today. Looking forward to improving our culinary lot in life …

Sunday, December 22, 2013

Fuji XQ1 Review – Part 7 – Macro in real life …

So I have this fruit fly problem. Not quite sure where they are coming from …

Anyway, I put this sticky plastic fly catcher on the window as it is supposed to attract them when the sun shines on them. No idea why, but it sure works.

It is interesting, and a little gross, to look at them close up. As they struggle, they get more body parts stuck to the glue and they kind of wreck themselves.

Warning: If you are squeamish, please do yourself a favour and give this one a miss.

The XQ1 is very pleasant for general purpose shooting, and that includes getting close in for macro shots. So when I had a nice day, I shot various angles on the flies that had been captured.


fuji xq1  6.4mm  100iso  f/4  1/200

Yes, I shot that at DR100 … there was no range to speak of so why not.


fuji xq1  6.4mm  100iso  f/4  1/120

This one ripped himself apart struggling … I actually feel a little sad to see this. On the other hand, I cannot abide insects in my mouse.


fuji xq1  6.4mm  100iso  f/4  1/150

In that one, you can see the reflection of the Fuji lens, which is kind of cool … sort of like a shark’s mouth looming …

I took the liberty of cropping the first image to see how well the XQ1 images hold their detail when enlarged past 100% … I think you will be surprised at how nicely this works.


click to see it larger in another browser tab

Is there anything more disgusting than seeing through a fly’s legs and seeing the hair on its head and back? This is seriously gross …

And that’s the point. This camera does a really nice job close in. Cropping latitude if very high and you should be able to have a great time with this camera and your local insects.

Fuji XQ1 Review – Part 6 – Macro …

This lens seems pretty similar to the lens on the F200EXR where is concerns macro, but let’s test that, yes?

We’ll pit the XQ1 against the obvious rivals … the F200EXR, which was the first pocketable EXR camera with a sensor larger than 1/2”, and the F770EXR, which is the first of the modern series of 500mm pocketable long zooms on the 1/2” EXR sensor. In my opinion, the 1/2” sensor is the cream of the EXR crop for raw shooters.

So let the games begin … the XQ1 opens with a pretty decent performance. At its closest distance, it manages 47mm across, or approximately 1:5.3 magnification.


fuji xq1  6.4mm  400iso  f/5.6  1/420

The F200EXR is up next, managing a disappointing 62.66mm, or 1:7.8 magnification. That’s pretty poor, good for flowers at best.


fuji f200exr  6.4mm  100iso  f/3.3  1/160

The JPEG engine in the F770EXR did not impress all that much, but the magnification is very good … a whopping 42mm, or 1/6.4 magnification at the sensor. The XQ1 is actually the winner where magnification is concerned, and it puts 12mp on the subject at DR400 where the F770 only puts 8mp at DR400 on the subject. One could, of course, shoot at 16mp DR100 and in the right light that would provide a digital form of magnification that is quite a bit higher than the XQ1.

But let’s just say that the XQ1 is right there with the F770 for general macro shooting.

Here they are all cropped with the same field of view in Lightroom and then exported at 1000px. The ratio remains and you can see that all three look very nice, so shooting insects is viable with all three.

XQ1

F200exr

f770exr

I didn’t pay much attention to white balance here, although I did set them all as custom white balance as the primary lighting came from a halogen bulb close up. I would normally add warmth to the F770 image, but that was not the point of this exercise.

Let’s see what full zoom macro looks like … You will see that the worm turns a bit as the XQ1 gives up too much focal length to compete.


fuji xq1  JPEG  25.6mm  800iso  f/5.6  1/30

For the raw, I gave it a bit more contrast and sharpness.

That’s really very nice. The crispness is quite remarkable for 800 ISO.

Next up is the F200EXR and it again chose 3200 ISO, so I had mercy on it and processed the JPEG (since there is no raw to process.)


fuji f200exr  32mm  3200iso  f/5.1  1/160

That’s actually quite nice. The bird has a nice feel of dimensionality to it and the detail is clean. All that light really helps, but I must say that I am very pleased with this image. I tweaked the exposure a tad to bring it in line with the others, and it was forced to deal with a lot of grain and weird mosquito artifacts, and of course with quite a lot of yellow blotches, some of which remain in the shadows. But the end result is quite acceptable. This makes a slightly better flower cam than the XQ1 just because of the extra focal length.

And then there was that 500mm lens … the F770EXR was a bit more difficult to shoot since I could not brace my arms on the bed on which I have the kit set up. So I had to hang the arms in the air at 500mm and 1/40s … if you have doubts about its ability to stabilize the lens you should ponder that this was almost 4 stops of extra stabilization. That’s good enough for me …

So here is the JPEG …


fuji f770exr  92mm  1600iso  f/5.3  1/40

This is really nice and the magnification is so strong that the nose is not in focus when the eye is in focus. Wow.

Next, the raw file … and there is more blue channel poison than I like, but it is predictable. Remember that the sensor has tiny photosites – 16M on a 1/2” sensor. So what happens here is that the shadows get pretty starved for photons (not kidding.) And when we correct the white balance from the astoundingly warm halogen bulb at 2200 degrees, we push the blue channel so hard that it begins to dominate. And that looks like …

Now, that’s not horrific, but I prefer to get the shadows back to black. And so I desaturate the blue channel in this case.

And that’s an excellent image. This does not happen in light that is not so out of whack, so don’t get too frightened by it. I don’t see this much in real life. But if you do run across it, you can use the JPEG, which is pretty good on the camera, or you can desaturate the blur channel a bit (many ways to do that … curves, saturation panel in CS or LR, and so on.)

Conclusion

These three are all great cameras. I like the XQ1 and F770EXR better than the F200EXR for general purpose shooting. The F200EXR has no raw and its JPEG engine is weak when compared with the others. The XQ1 is especially strong since you can tune it to your heart’s content.

For macro, the XQ1 wins close in with the F770EXR breathing down its neck, but the long lens wipes the floor with the XQ1 when you want to shoot flowers, or skittish animals or insects. Much better magnification and working distance.

So … for macro, you can use it, but you might be happier with one of the F series if you plan on prancing around in the gardens as I do :-)

Fuji XQ1 Review – Part 5 – More on Dynamic Range and photographing back lit objects like Amaryllis (Hippeastrum)

To recap the impact of the XQ1’s X-Trans sensor on dynamic range – it does not have hardware dynamic range extension as does the EXR line of sensors. Instead, it uses Fuji’s software implementation, which demands that ISO is raised stop for stop of dynamic range extension. So adding a stop of dynamic range requires that you shoot at minimum 200 ISO, and 2 stops requires 400 ISO. That’s how it has been since they introduced the feature in the S100fs and that does not seem to be changing.

Note: The software DR extension in other brands generally does not have ISO restrictions, being implemented purely in software. I have no idea why Fuji chose this method, but it does lessen the effectiveness of the technique somewhat.

So I have this Amaryllis bulb that I planted perhaps 6 or 8 weeks ago. Being a fairly large bulb, it has done amazingly well. I have it in front of a kitchen window so that it can get access to as much light as possible and it has responded well.

Here is the first image I got from the XQ1 of the plant in full bloom. It is backlit (obviously) and I shot it at 100 ISO, which forces DR100. Thus, it has the best noise profile and the worst dynamic range. This is the JPEG and you will note the blown out background and fairly dark foreground. Not my favourite result.


Fuji xq1  10.9mm  100iso  f/3.8  1/15

Now here is the same image from the raw file:

A much better result, but the background is harsh with many blown out areas. Bummer. So even in raw the DR100 files have poor latitude. No surprise, just be aware of it.

So what happens of we shoot at 400 ISO with DR400 in effect?


fuji xq1  6.4mm  iso400  f/4  1/40

Now that’s more like it …

The same angle at 100 ISO and DR100 to refresh your memory …


fuji xq1  6.4mm  100iso  f/2  1/40

These were shot minutes apart, so there is no hocus pocus going on here. And both are raw images processed pretty much the same. I think the DR400 is a tad warmer, but that’s not the relevant difference.

The plant is quite full here as it has two stems in full flower. Eight large blooms together is a beautiful show. This backlit scene never had a chance to retain detail in the background at DR100, but in this case the result is ok …

Clearly, DR extension works. And works well. The question is whether it creates too much noise and edge destruction for your taste. Here, you cannot tell the difference in the RAW images and I can say that the JPEGs show no difference either. I will show more detailed comparisons later.

That evening, I shot a few images at high ISO with only the under-counter fluorescent lights across the kitchen for lighting. I corrected white balance on the flower itself, using the white parts of the petals as neutrals.

At 3200 ISO, I think the XQ1 is serviceable …


fuji xq1  25.6mm  3200iso  f/4.9  1/13

That’s one seriously full Amaryllis.

A few days after that series was shot, the first stem had lost all but one of its blooms. And a third had popped up. A very impressive performance by this bulb I must say.

I shot this series from across the room at full zoom on the XQ1, which means that the slow lens came into play. I also stopped it down a bit to f/5.6 to maximize sharpness. Here is the JPEG and the background is fully realized at DR400.


fuji xq1  25.6mm  640iso  f/5.6  1/30

Now here is the raw image, processed to my taste.

That’s more like it … just a bit of opening of the shadows and a slightly warmer presentation. Note, however, that I still have the auto white balance tuned to add warmth as documented in another part.

So how about this for a treat? The Fuji F200EXR takes on the XQ1. Let’s see how the DR and image quality compare …


fuji f200exr  28mm  3200iso  f/4.9  1/180

Huh? Why would the auto in P mode choose 3200 ISO when it easily could have dropped safely to 800 ISO? Well, who knows. Fuji have had problems with such things in the past and when you compare cameras you sometimes see bizarre issues.

Of course, the background has been held. Sort of. The camera just seems really insensitive next to the XQ1.

Anyway, it’s acceptable, but you have to take control of the F200EXR obviously, since it makes some pretty bad decisions with backlit subjects. And there is that cold Fuji white balance that has plagued the line forever. In this case, were I to reshoot with the F200 I would choose cloudy white balance.

Finally, just to show you a really unusual twist with this second stalk of the Amaryllis, here are the five blooms. Wicked …

Note: Macro mode used for both cameras, 3200 ISO chosen by both cameras (correctly, this time.)


fuji xq1  6.4mm  3200iso  f/5.6  1/30


fuji f200exr  6.4mm  3200iso  f/3.3  1/45

Not much of a contest here. The jpeg engine in the XQ1 is vastly superior. The sensors are pretty close in size, but there is really no contest after downsizing. I did get a bit closer with the F200 and that shows in how nicely blurred the background is. But I think I could have replicated that with the XQ1 … I will test them head to head more seriously in a future part.

So … conclusions:

  • Check your Amaryllis bulbs before purchase. Bigger is better, always.
  • You are safe enough with the XQ1 in DR400 despite the forced ISO 400 … it is clean enough to make it worth while with much better backgrounds and real improvements in dynamic range, even in raw.
  • Tune your JPEG engine if you want to get rid of the cold presentation. As in:

    This might be a tad strong for some … just tweak it until you like it.

Saturday, December 21, 2013

Unfriendly software – Even Adobe is not immune …

Lightroom is a relatively new bit of software, and a darned good one. In fact, Lightroom now satisfies at least 99.9% of my needs as a photographer (admittedly at the casual enthusiast level.) I own the Nik suite of Lightroom compatible plugins yet I never use them. I own the Perfect Suite 8 and use them once in a while, but not as often as I think I should. All this because Lightroom 5 is so complete. It is simply excellent.

But wow, can it ever be unfriendly sometimes.

image

When you say yes to backing up your catalog (a very good idea now and again) it pops a modal dialog and just sits there. I have it full screen and there are no buttons on the dialog to minimize it to work in the background. Clicking minimize on the main windows does not work either because the dialog is modal.

Contrast this to Chrome, where the download dialog is not modal and can be minimized along with the main window. In fact, either / or can be minimized. Chrome is well written, Lightroom is clunky. I would suggest that it acts like it was written by an intern, and I would bet that I am not far off :-)

Of course, maybe that’s just how they do things there … who knows.

Fuji XQ1 Review – Part 4 – How to shoot that Christmas Tree at the best ISO and DR settings?

Yes, this is the politically incorrect blog that recognizes that I was brought up to enjoy the Christmas season. I do my best to call it the holiday season when wishing people a “good holiday” and such at the office, but that’s not going to cause me to call one of these a “holiday tree” … sorry, but that’s just not on.

So please don’t take offense at the subject matter … it’s just a fake Christmas Tree with some LED lights on it. No ornaments except for the Christmas Piranha, visible just below the level of the mantle and just in a bit from the right edge. Jon insisted that it has become a tradition now and he went and got it and placed it into the tree. Such is how important family traditions are forged. In this case, they can be forged in blood should you reach into the tree without seeing the Piranha lying in wait :-)

And so … how should you shoot your Christmas Tree (or whatever you might choose to call something that might be lit in your home at this holiday time of year) … that last part is textbook “throw the readers a bone” should you be confused at my change of tone.

I digress …

I like to shoot from a tripod. I like to slightly overexpose, as I like the room lit and I like to see some level of glow from the tree.

With small sensors, you have to be pretty careful, as it is easy to blow the highlights and wreck the shadows. The softest tone curve helps, as does bracketing. In this case, I performed some ISO bracketing just so you can see that shooting at higher ISO to hand hold images is not actually a serious fault. You can get a nice image for the web that way.

A note before we get further into it: I shot these in RAF + JPG but used only the RAFs so that I could equalize the images.

So at 1000 ISO, the XQ1 does a pretty decent job:


fuji xq1  9.7mm  1000iso  f/4  1.0

Note the 1s exposure time. So at 1000iso, we’re still not getting much relief. Even at 3200 ISO, we’ll be at 1/3s and thus not hand holdable. bracing the camera on something will work, but seriously consider getting a cheap tripod if you don’t have one. You will be glad you did.

Without moving the tripod, I dropped ISO to 400 and reshot.


fuji xq1  9.7mm  400iso  f/4  2.5

The only other change was that the camera chose 2.5s as the shutter speed. This is exactly the number you would expect since 400*2.5=1000 (it really is that easy with shutter speeds and ISO.)

And then I dropped it to 100 ISO and the camera dropped it to DR100 in response. (I’ve mentioned in the past that I always shoot DR400 when possible and this has not changed with the XQ1.)


fuji xq1  9.7mm  100iso  f/4  10

And of course by cutting the ISO to 1/4 you get 4x the shutter speed. Still works perfectly.

So has the drop from DR400 to DR100 made a difference? I think so. While the drop in ISO has cleaned up the shadows and made everything look cleaner, the drop from DR400 to DR100 has added a bit of an edge to the lights. The blue on top middle is the best example … in the top two images, it goes from the light to the glow smoothly. Looks great in my opinion. In the bottom image, DR100 puts an edge around the light, essentially a harsh transition ring that is effectively a halo. It is visible in some of the other lights as well.

It always comes down to a tradeoff when you don’t have EXR support for dynamic range. You shoot at DR400 and your lowest ISO is 400. Can you stand the extra noise and edge destruction? Or do you prefer cleaner shadows and edges at the cost of less pleasant handling of highlights?

Your call … I tend to default to taking the pain and performing noise reduction. Nothing can save blown highlights after all … and in this case, the harsh rings around the lights are minor, but still visible. And I simply don’t like that effect.

Ikea Picture Frames – Some of them really suck …

I have a nice 24x36 print of Gamla Stan in Stockholm at night and in the rain. Very nice when you stand back and just look at it. The frames at Ikea come in several types and I chose a fairly nice looking frame with a glass front, the model being the Strömby. It features a fairly narrow aluminum frame with a thin glass front and no mat. I planned to lay the print on top of the grey background and simply center it with no edging. The background would act as a mat.

I had the frame lying on a table and as I went to turn it over,  I applied a tiny bit of pressure on the corner to lift it and heard an immediate cracking sound. I was stunned to note that I had destroyed the frame in the first second of trying to use it. It was that fragile.


Fuji XQ1  6.4mm  400iso  f/1.8  1/60

I don’t understand the symbols on there, other than the recyclable symbol. The rest are gibberish to me. I wonder if one is a warning to be incredibly delicate with the flexible (a.k.a. cheap) frame and the fragile glass. Doubt it, but it would have been nice.

By the way, only the corner semicircular crack happened as I went to pick it up. The rest of the cracks radiating from the center appeared a few seconds later. I claim the 5th …

So let me be clear … give this one a miss. I have duct taped cardboard across the face to protect the men who will pick the whole thing up from the street and throw it into their truck to be crushed. A total waste of money …

By the way … do note how well the XQ1 handled the photographic evidence. That 1.8 lens is very useful for this kind of imagery in the house near a window …

Saturday, December 14, 2013

Fuji XQ1 Review – Part 3 – Christmas Craft Show

Karen had won two free tickets on the radio, so we stopped at the front desk and then wandered about. This was two days ago on opening night (it has a 10 day run.)  The building is a massive show center nestled in between the various roads that lead to the airport.

image
View Larger Map

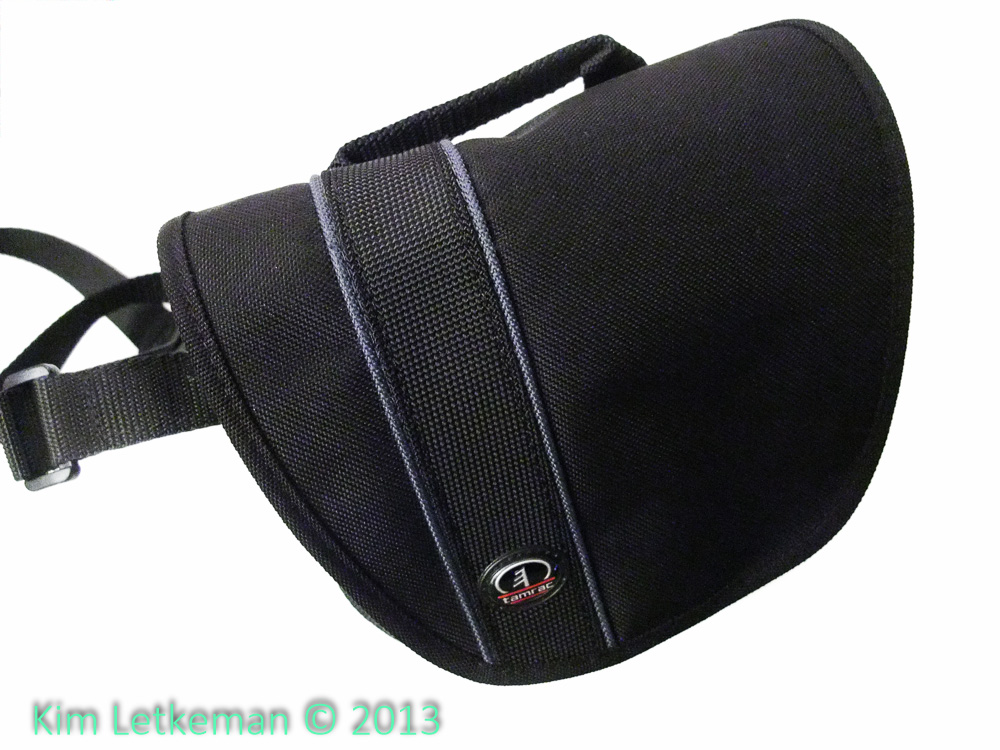
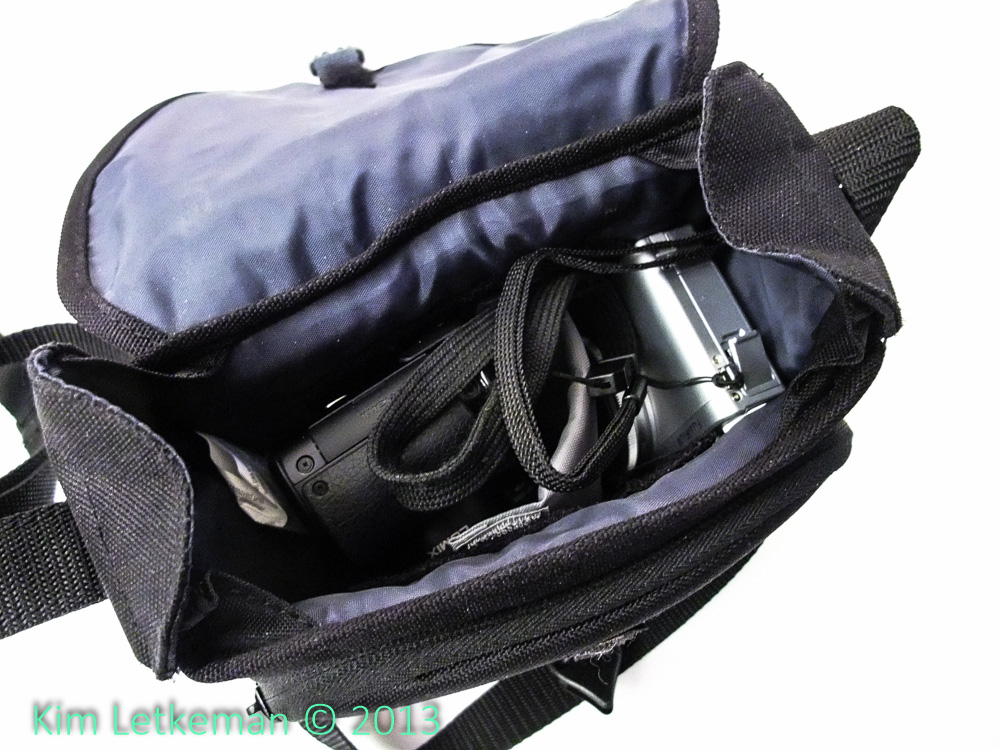
I carried the XQ1 and the GX1 with X VARIO PZ 14-42 to this show in a small case, the Tamrac 1440.

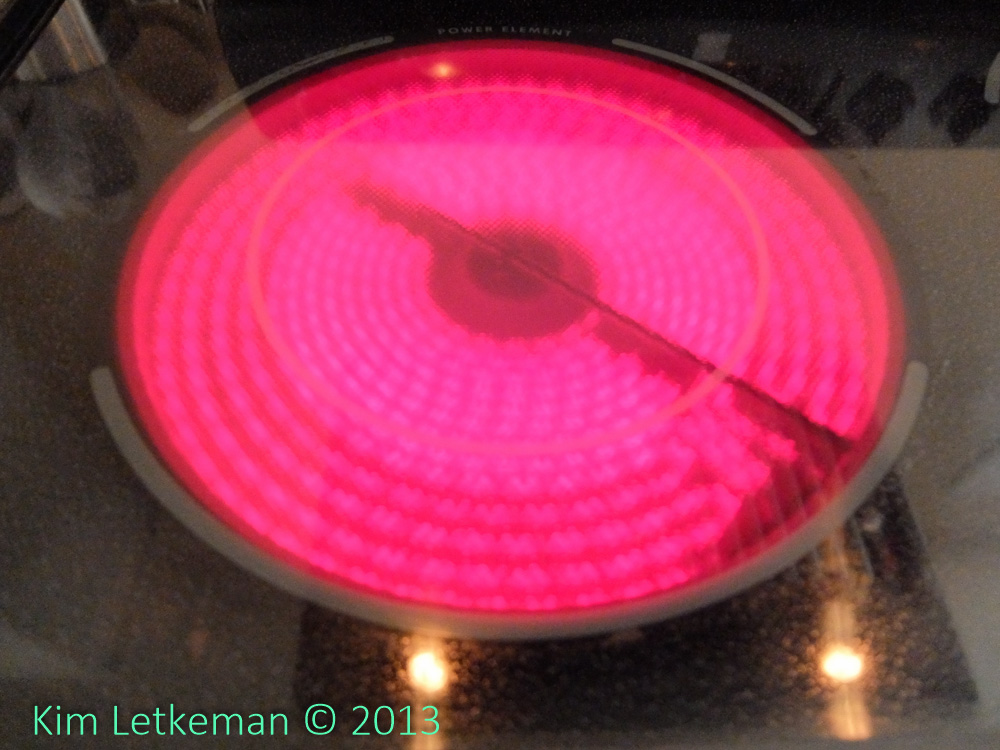
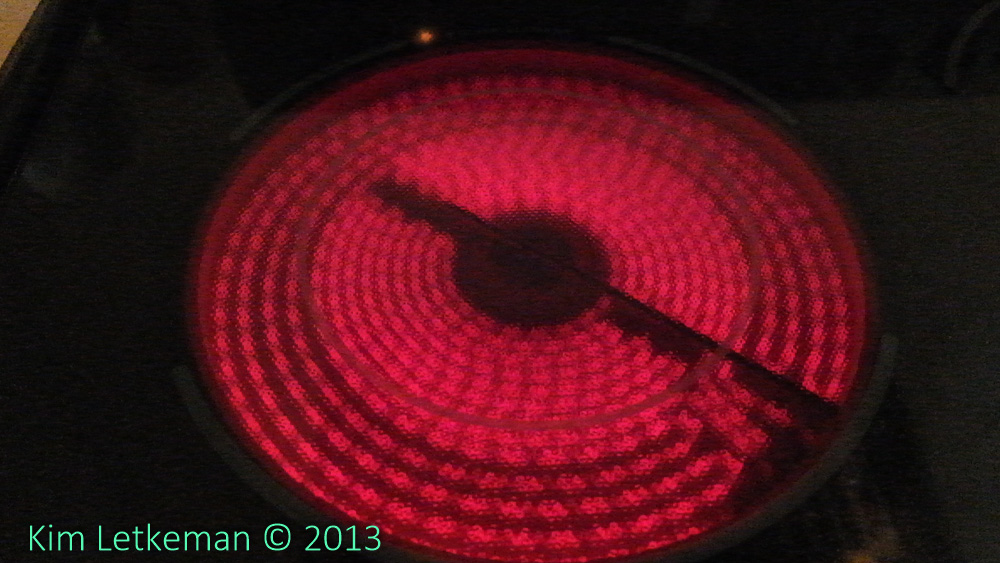
Fuji f200exr  1600iso  f/3.3  1/15  6.4mm

For this next shot, I boosted the exposure by a stop for the F200EXR. You can see that the two cameras fit with ease using a single divider. Both shots were processed in Lightroom.

The thing is, though, that I found that once I had the XQ1 in hand, I didn’t even think about the GX1. The XQ1 never felt like it was not enough camera. And in fact it shoots well enough that I enjoyed carrying it quite a lot. So I can see the appeal of small cameras with fast lenses.

Before we begin, I am only going to show some representative samples. If you want to see all the shots from the show, and indeed all the shots from the XQ1 and about the XQ1 so far, look at the album in my gallery here:

http://letkeman.net/Gallery/miscimages/Fujifilm-XQ1?show=17411

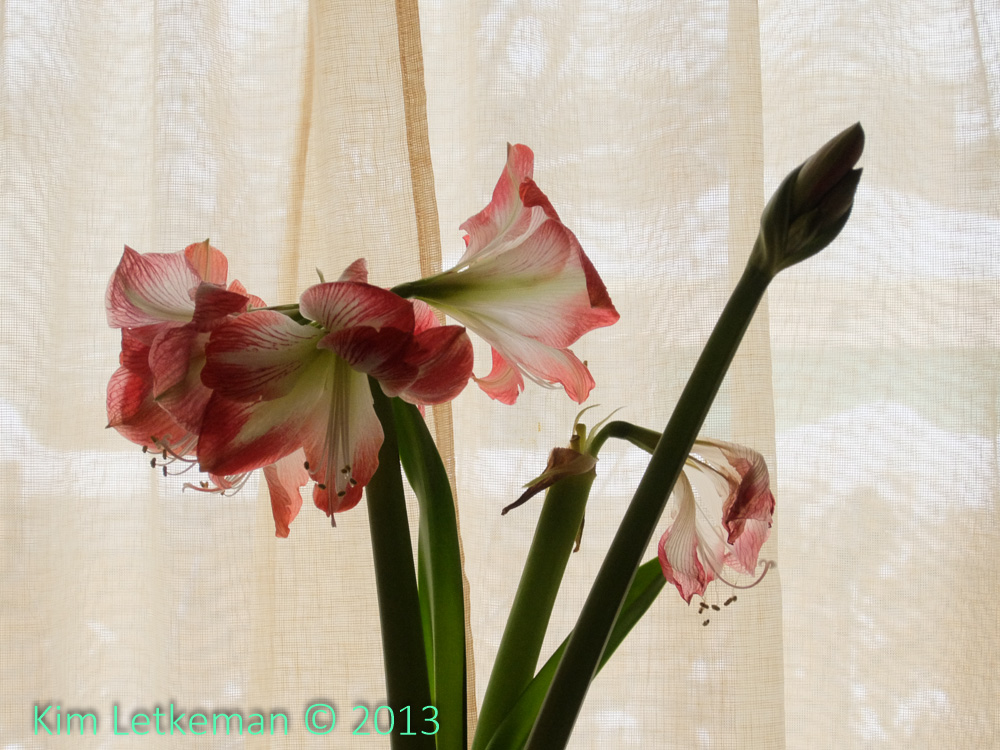
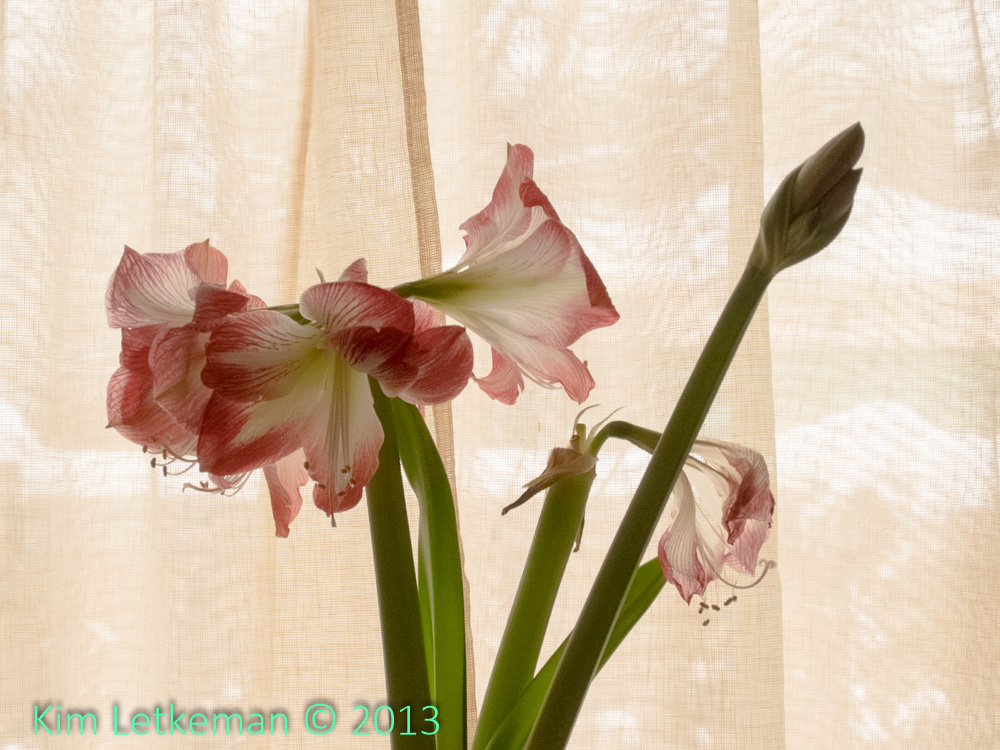
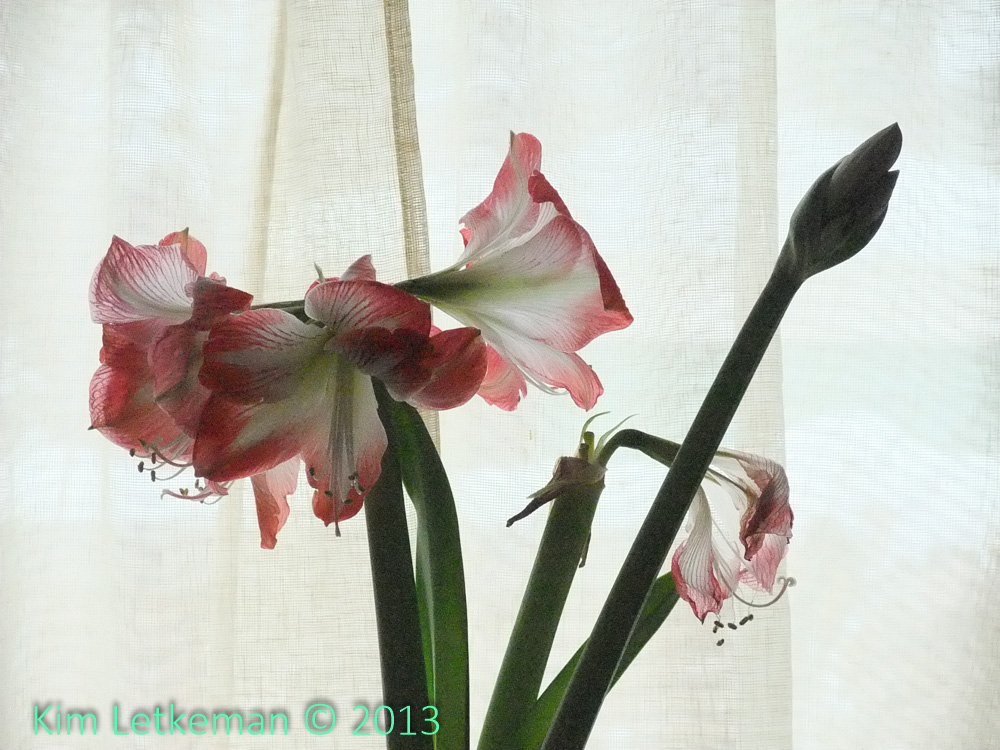
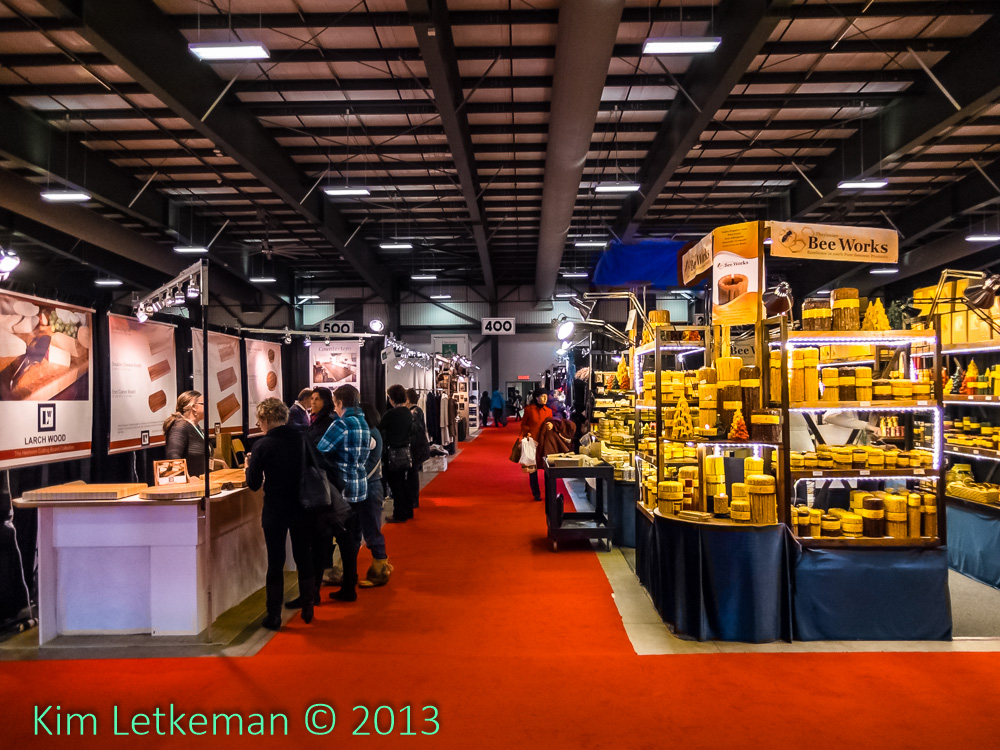
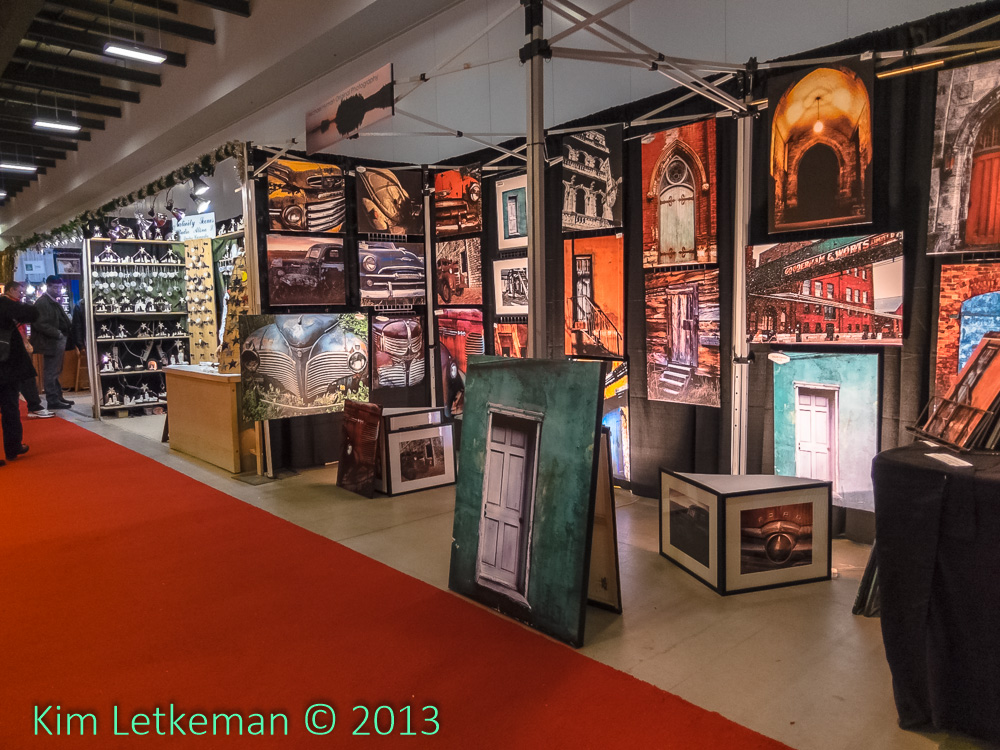
My first shot shows you the scale of the show. Huge booths that go on for row after row with vendors from all over North America.

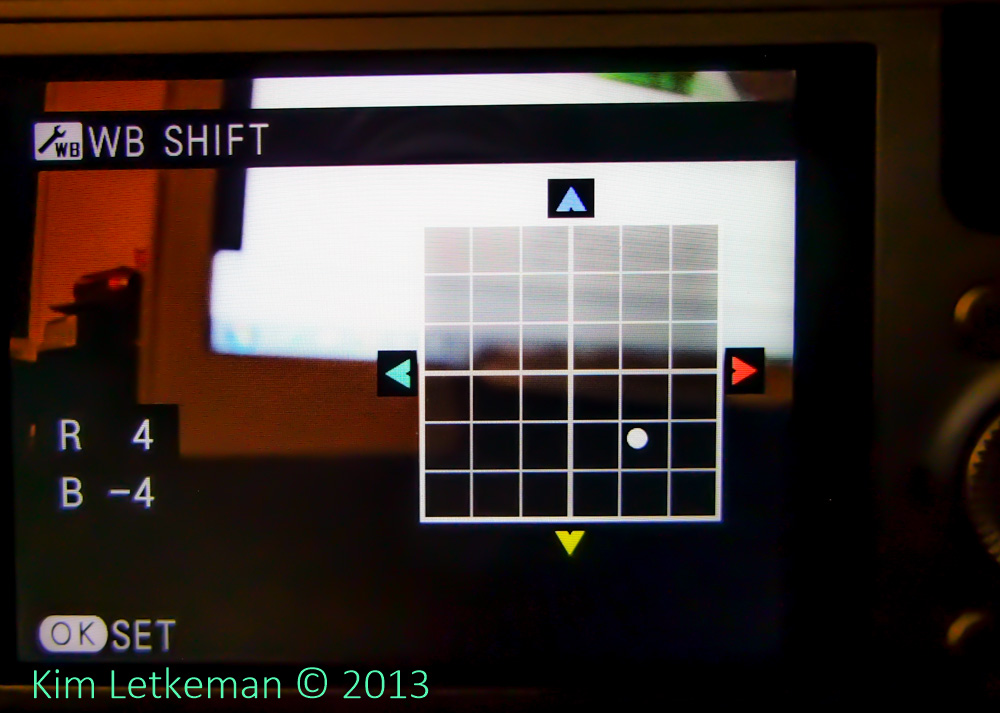
All of these images have been shot in JPEG FINE + RAF, but you will only see the Lightroom processed raw files here. I like the JPEGs, but the white balance was too cool by default. And frankly the tones are nice, but I much prefer more open shadows etc. So I would tweak the controls quite a lot before I would be satisfied with the JPEGs. I will try to get that tested in a future part.

I’m extremely impressed by the sheer scale of some of these booths. This one is filled with some really decent photography. Karen felt that the old car series on the end wall reminded her of Cuba. I’ll have to take her word for it.

The XQ1 handles this lighting very well. I did have to set the raw conversion to boost the lighting etc, and you can see the complete conversion settings that I used as defaults in part 2 of this series. I also get a good feeling for sharpness, even at 1.8 where I shot most of the night. This speed allowed me to shoot at 400 ISO much of the time.

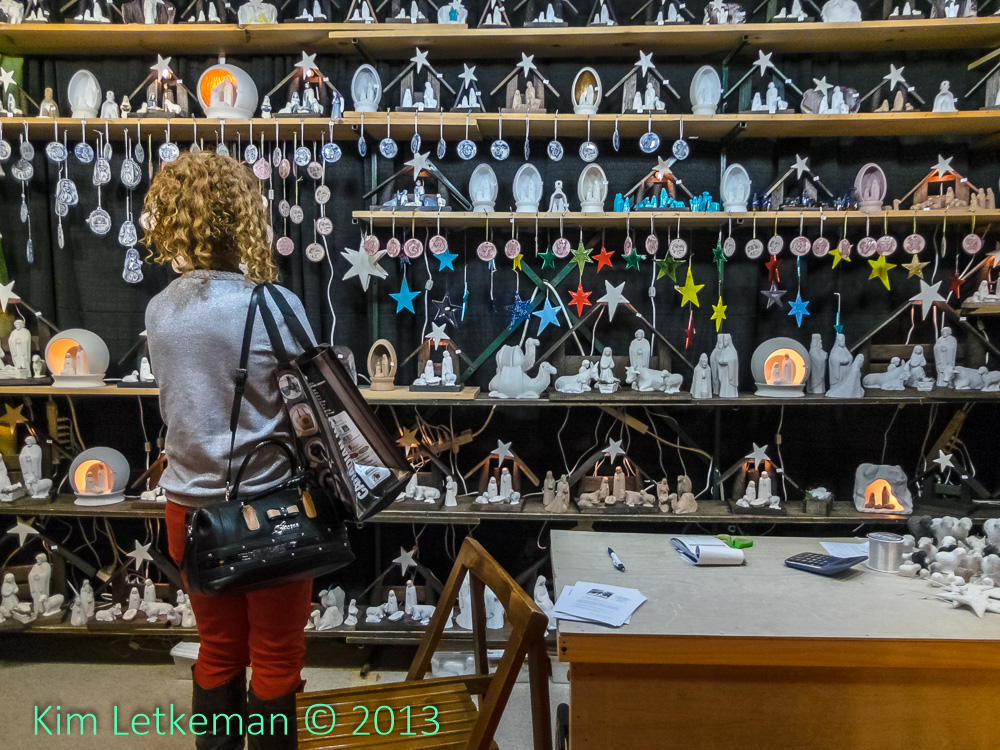
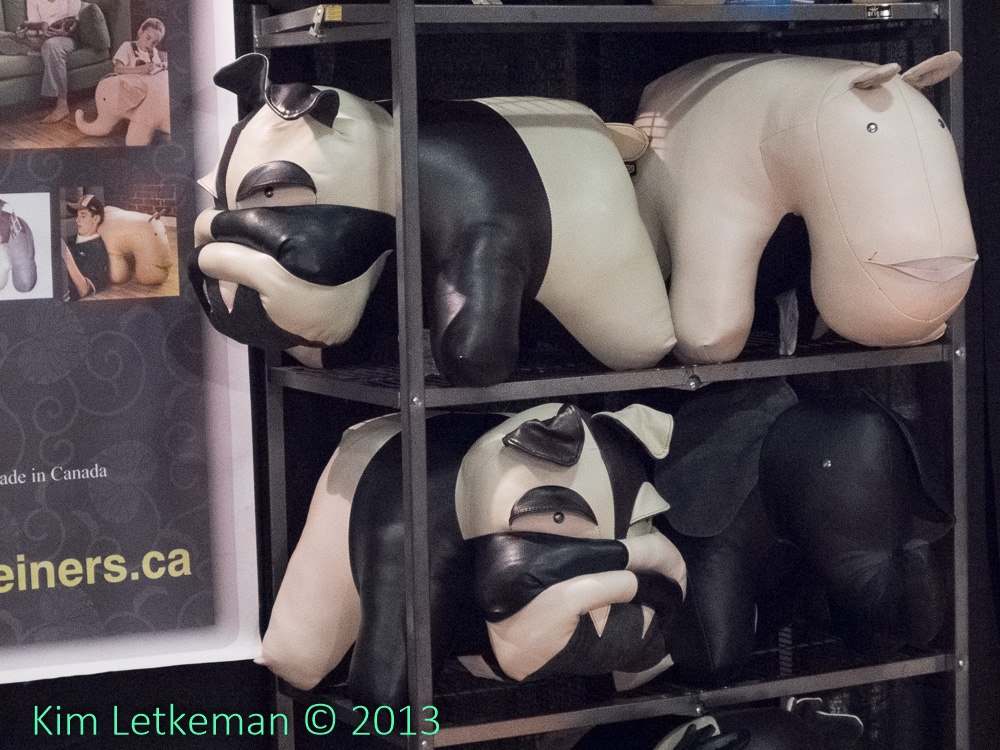
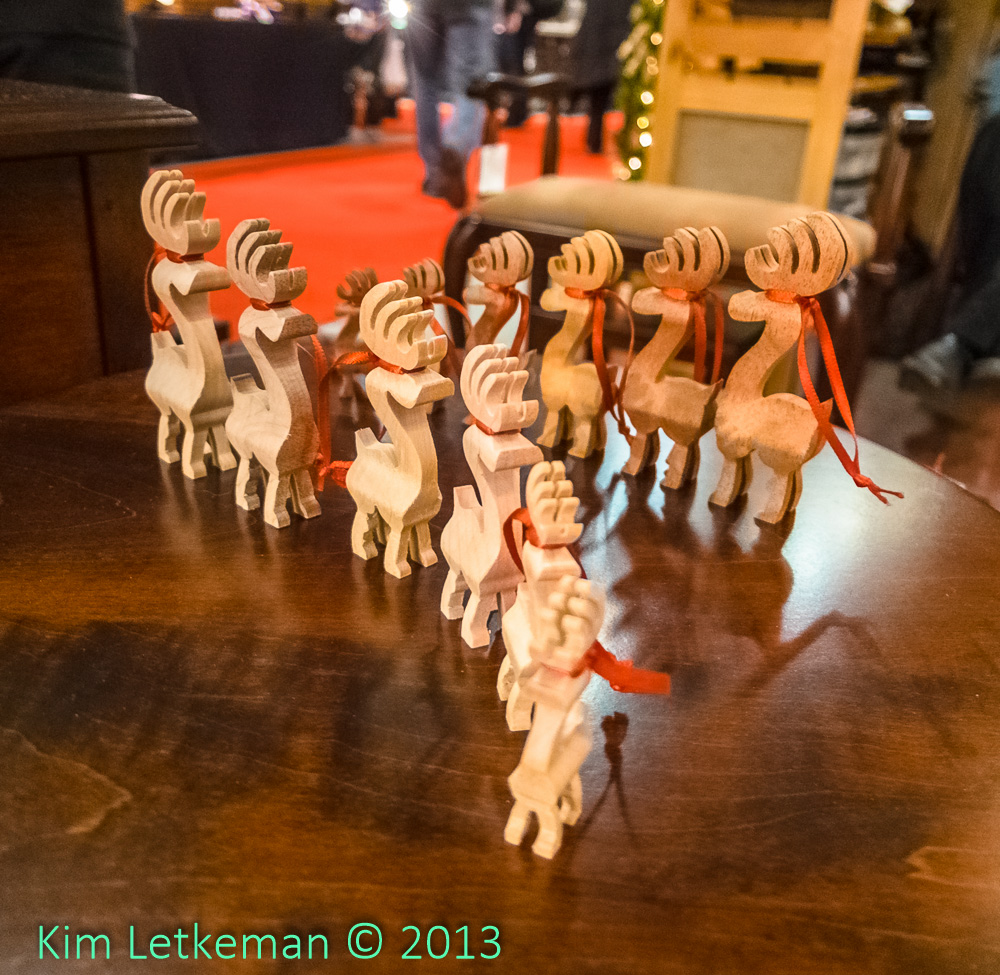
I don’t see any loss of sharpness when I crop tightly, either – even at f/4.9 and 800 ISO as I shot the next one at full zoom. These little guys were really well crafted and very detailed.

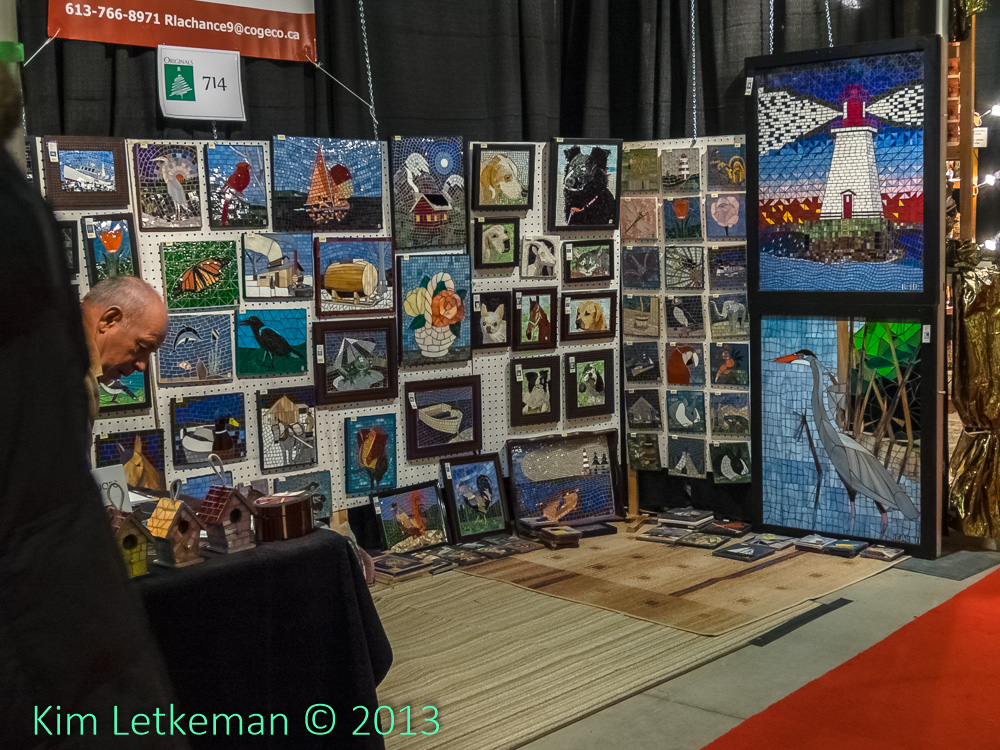
A lot of people spend a lot of time creating their art and crafts for sale at these shows. The mosaics in this booth must have taken forever …

These have a rather cottage-y feel to them …

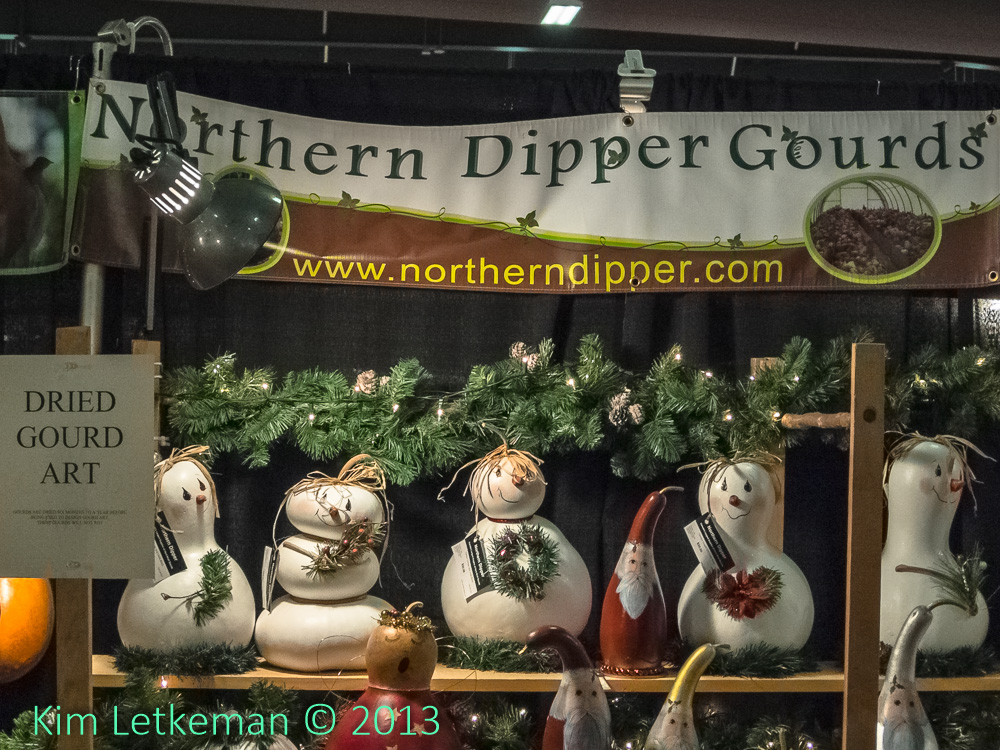
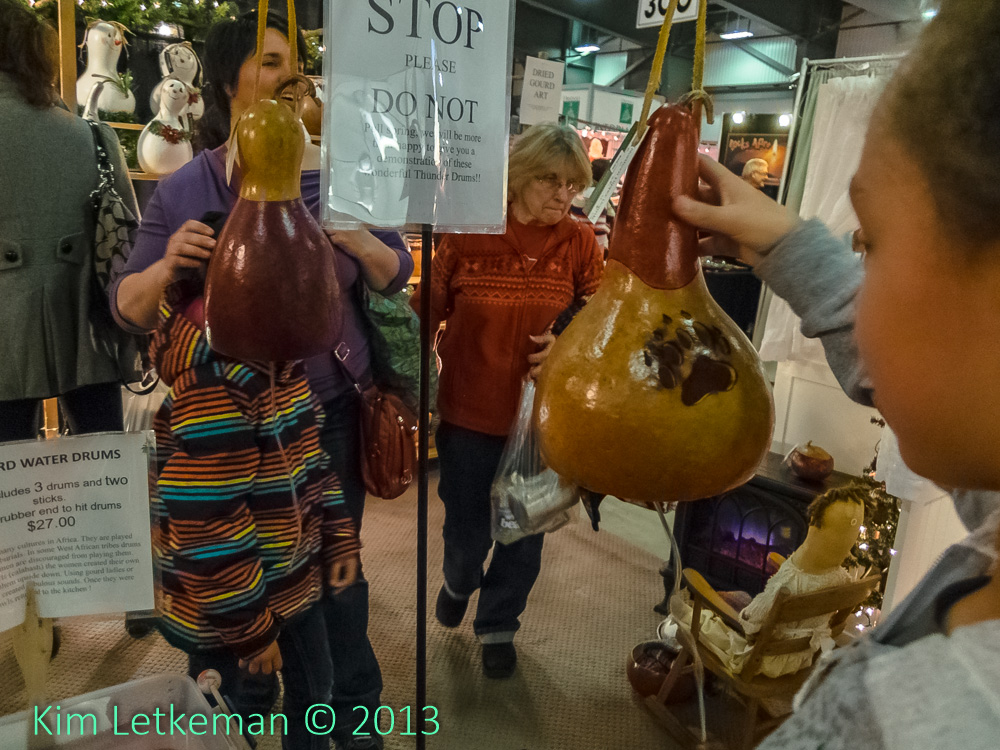
The long springs hanging out of these gourds – when twirled – create a deep rumbling sound that is hard to define. Kind of like a small earthquake. Very impressive and I’m kind of regretting not getting one :-)

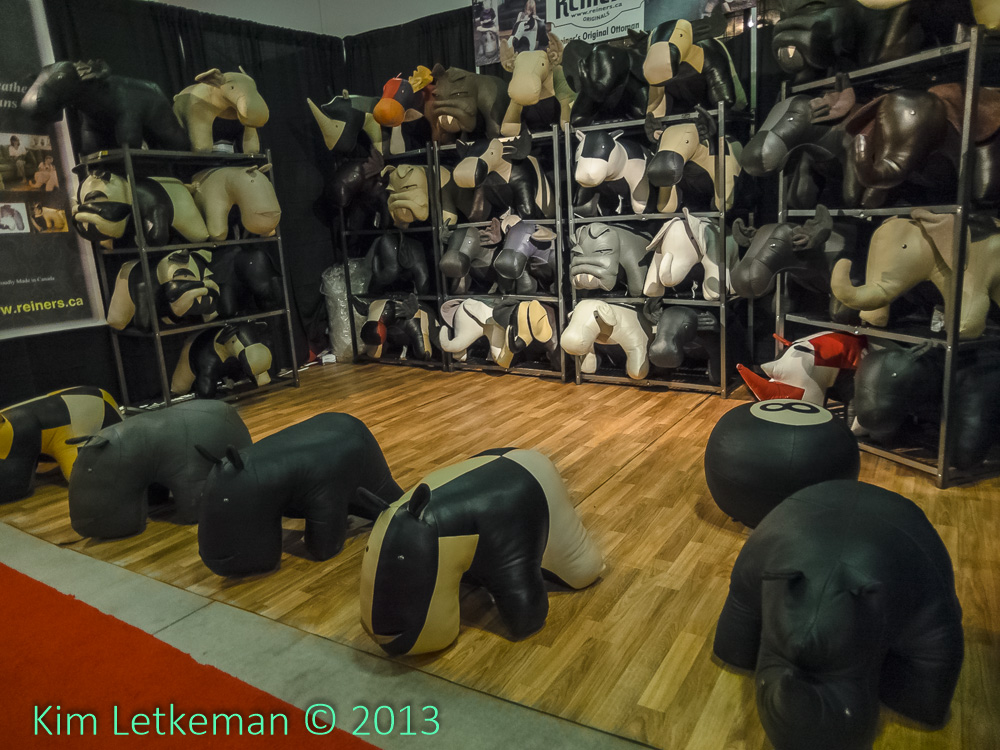
These are really cool chairs for kids (presumably.) The XQ1 renders the leather (or maybe it is vinyl) very well. I get a real sense of dimensionality from these images.

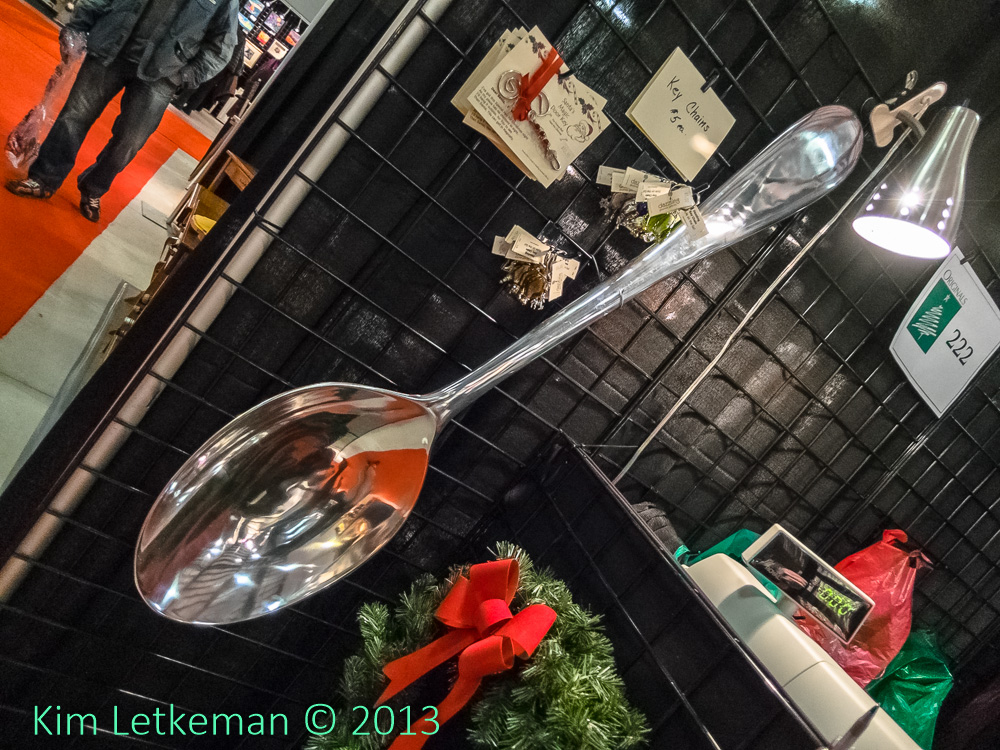
This next one is 3200 ISO and looks great.

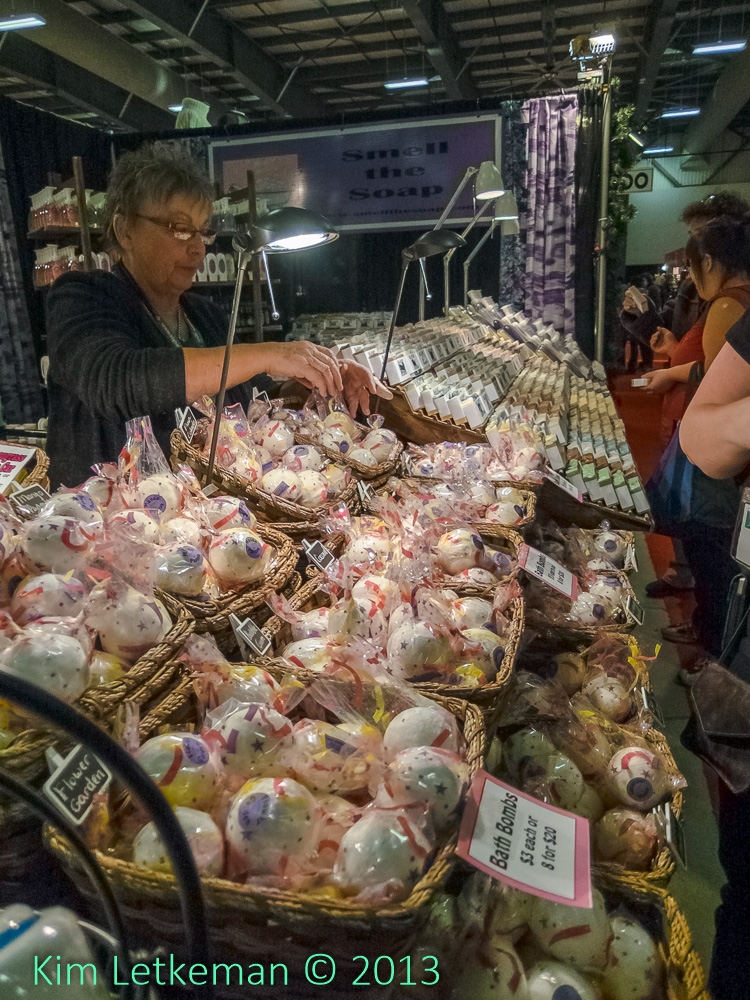
Several vendors selling hand made soaps and bath bombs. I was really tempted by the soaps as I like sandalwood’s smell. But alas … $6 per bar was just a bit too much.


I really like the tone and dimensionality of this image too. The XQ1 does this stuff really well, even at 1250 ISO.

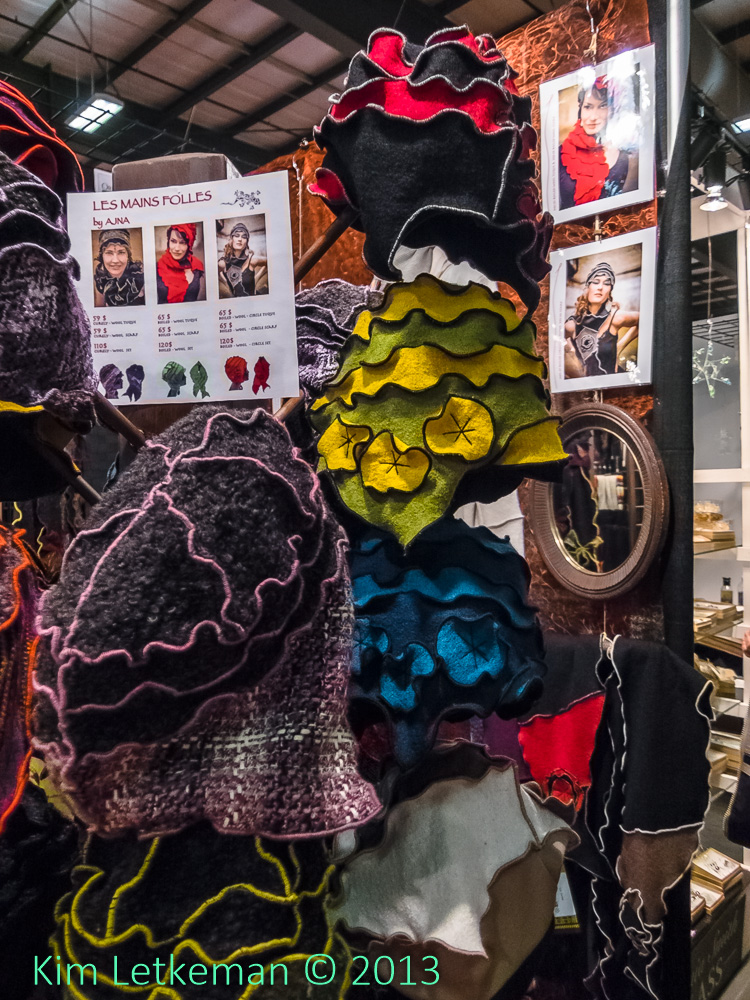
Excellent detail and color … these hats are a little much for me, but would look great on young women :-)

Lots of carvers at this show … amazing wood furniture and carvings on display …

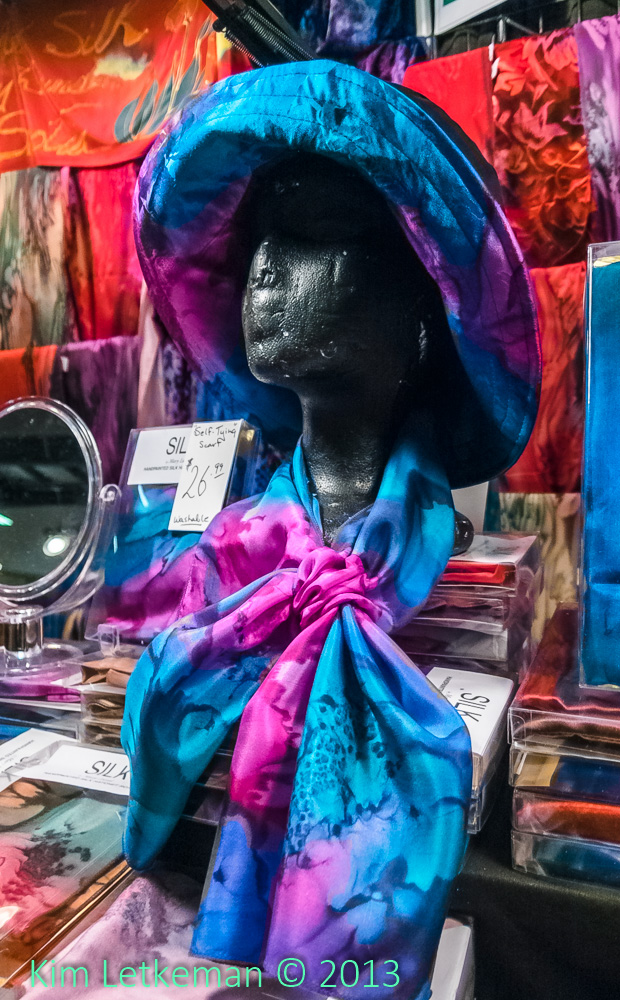
This image really captures the colors in this booth. (Of course, you might think differently had you seen the original … my color deficiency tends to mitigate my ability to tell the image from the original.)

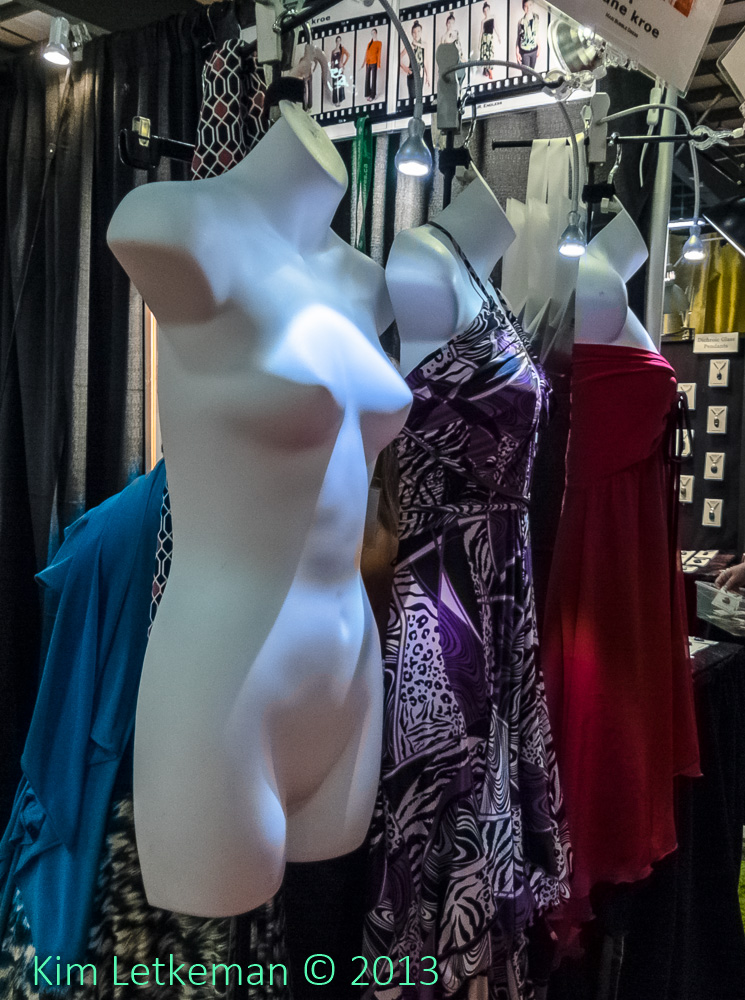
Mixed lighting makes the armless and legless mannequin look really interesting …

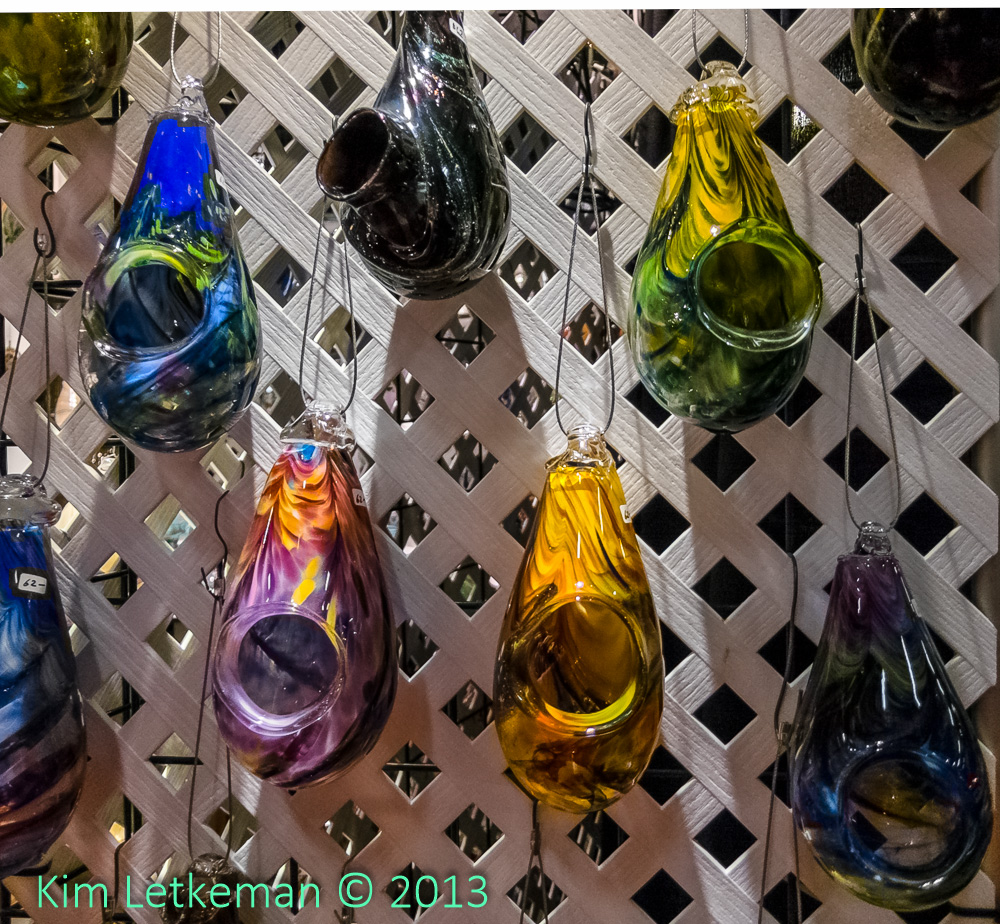
These glass feeders / bird houses / whatever are really gorgeous to look at … I have always been a sucker for glass surfaces.

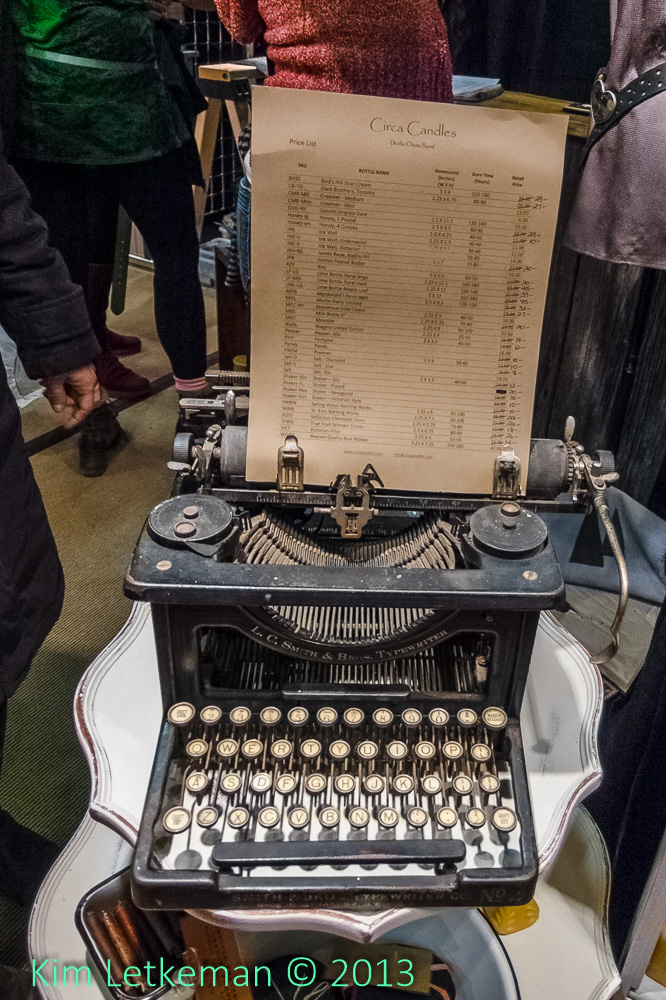
The old typewriter caught my eye and I could not resist …

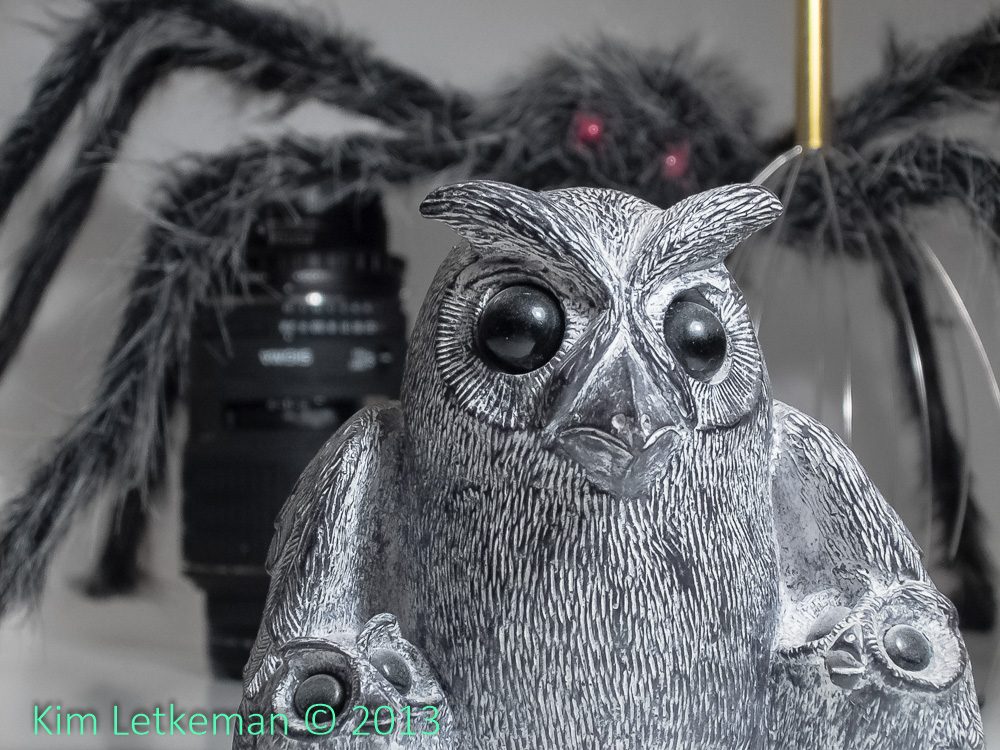
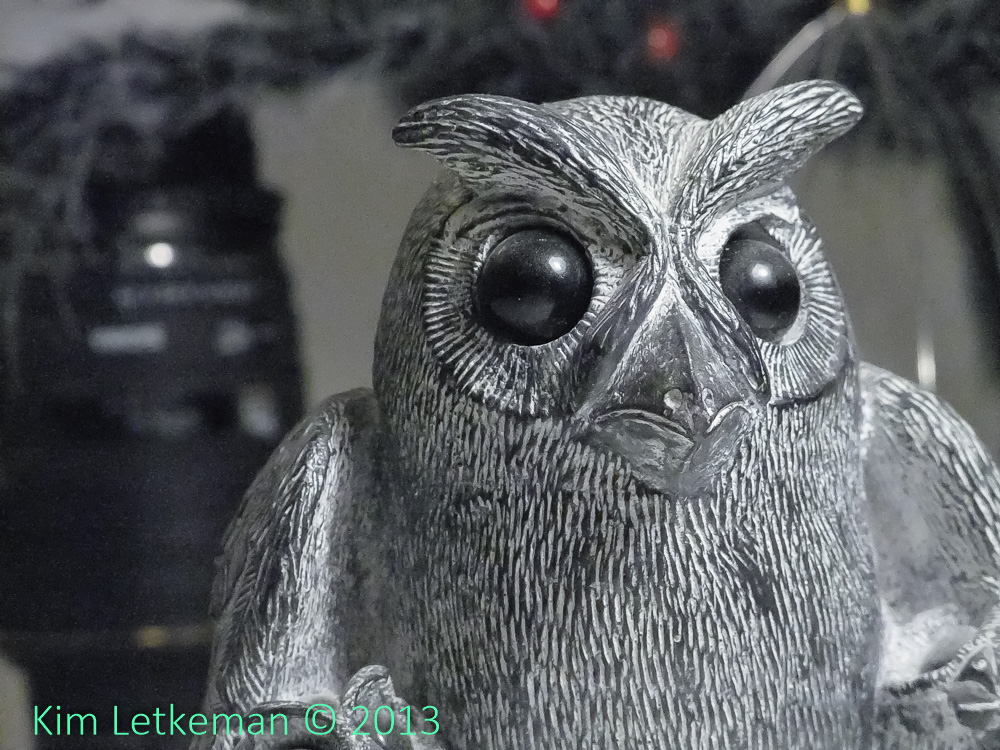
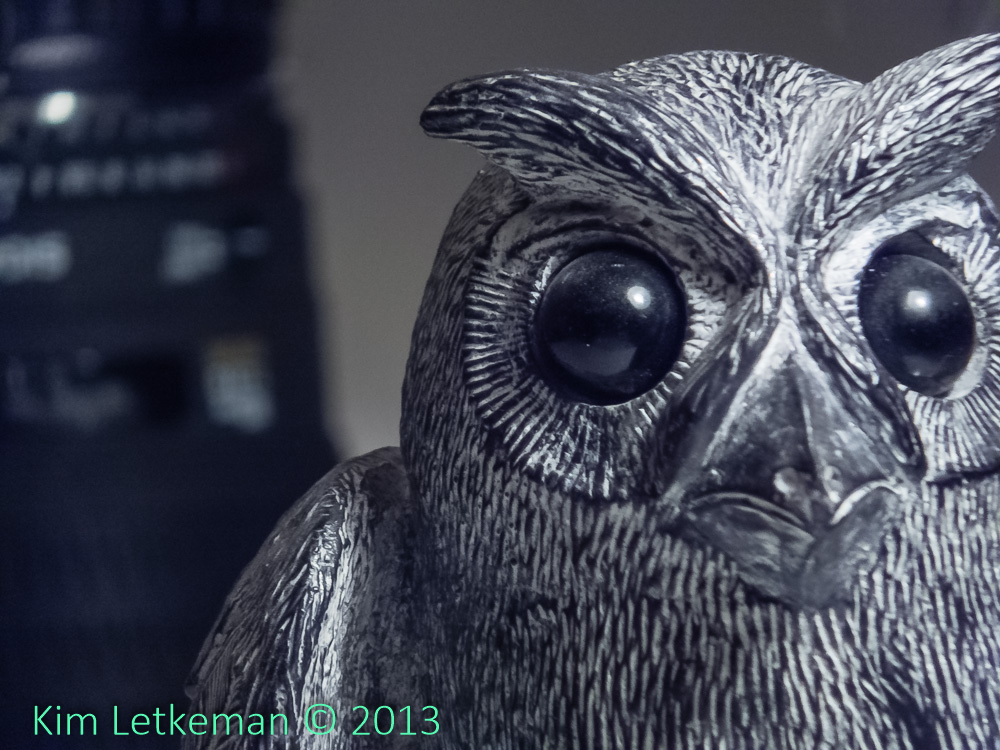
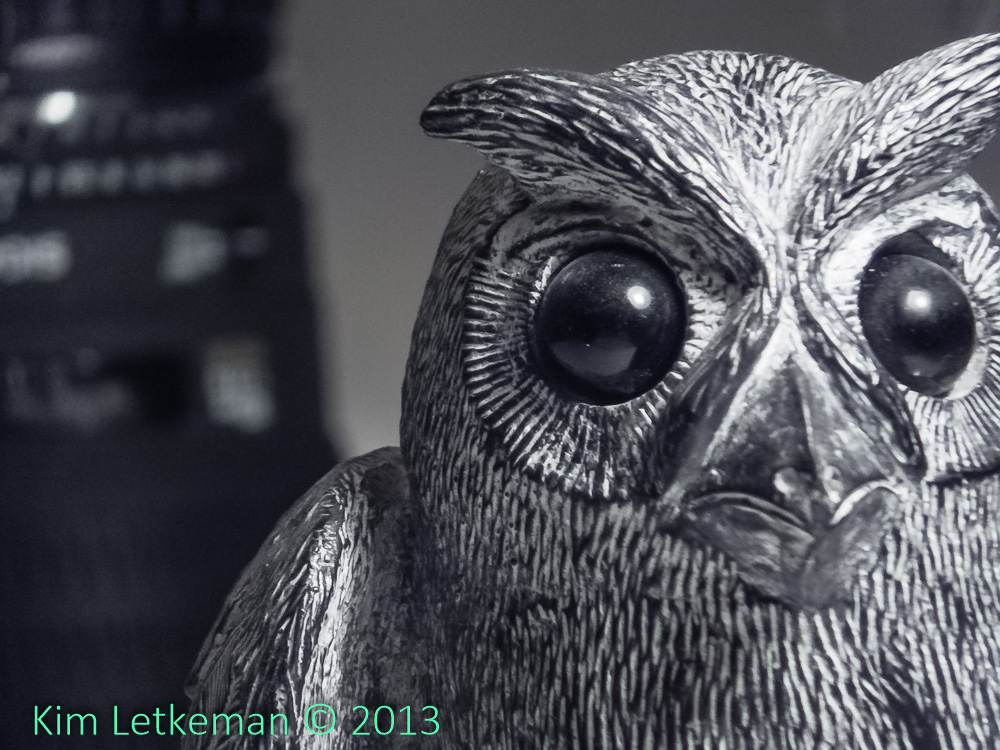
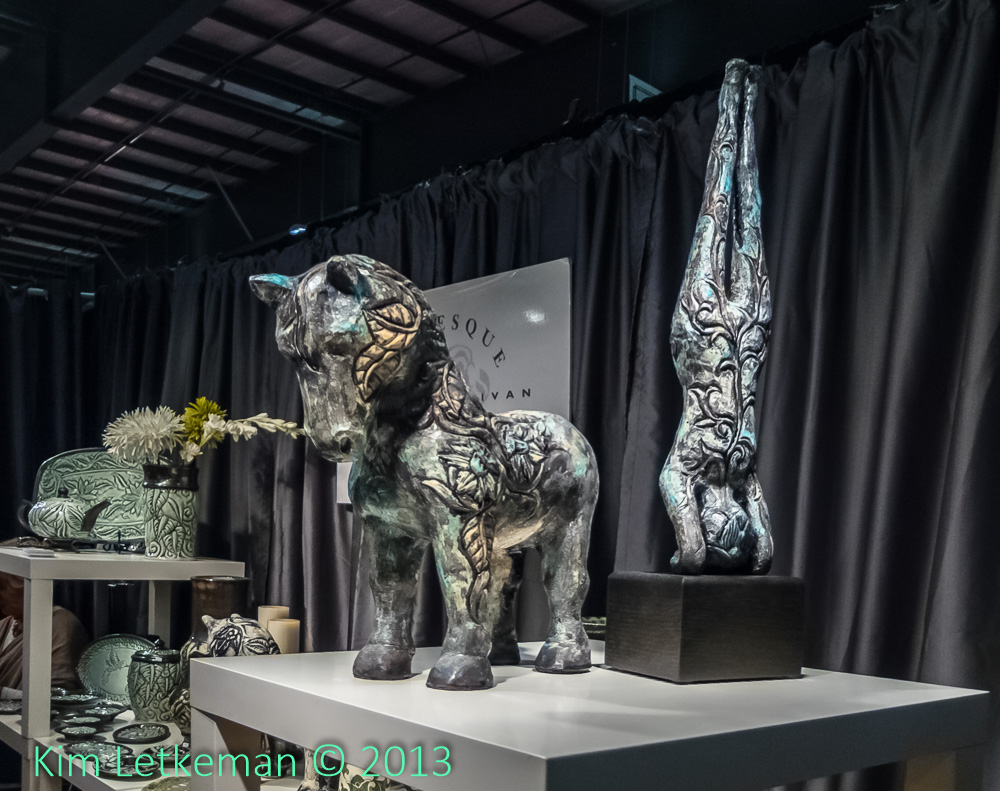
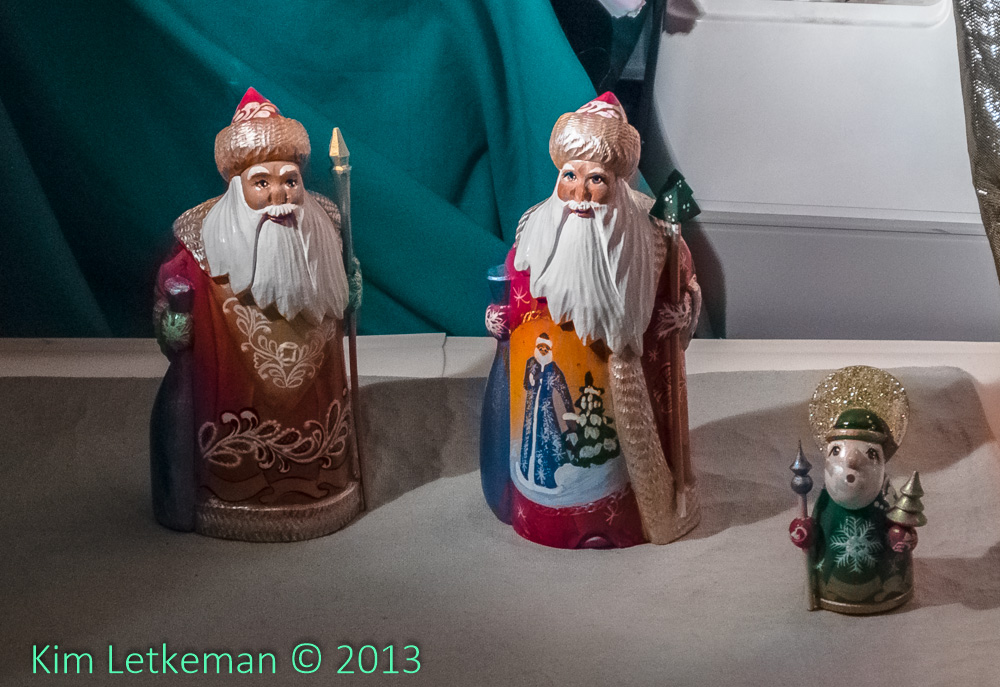
I particularly like these statuettes …

The Larch wood butcher blocks were probably the nicest looking of the three or four vendors selling such products. I did like another one, though, which mixed imported woods of various types into rather unique butcher blocks and cutting boards.

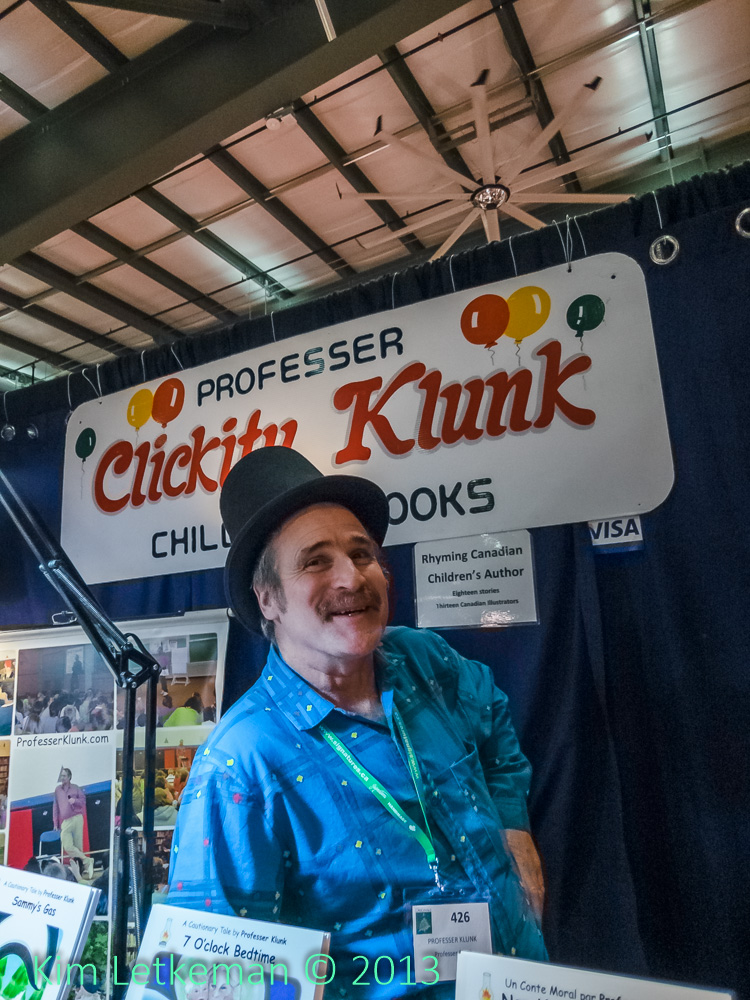
This guy was pretty cool … he has a series of children’s books and a book or poetry for more advanced readers. Very nice fellow …

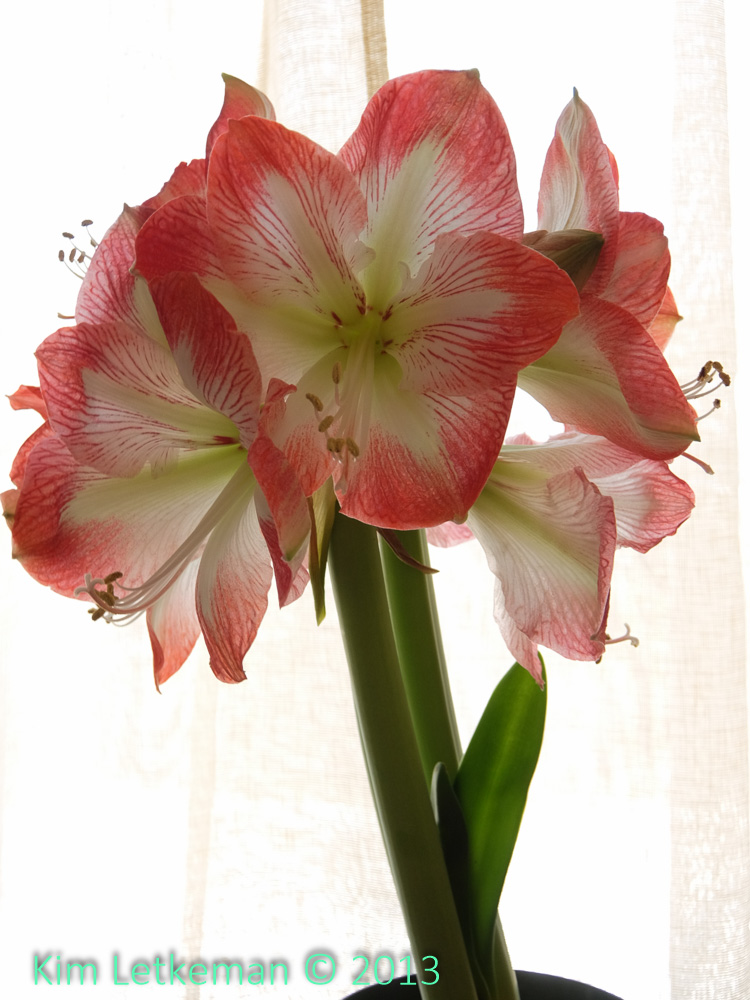
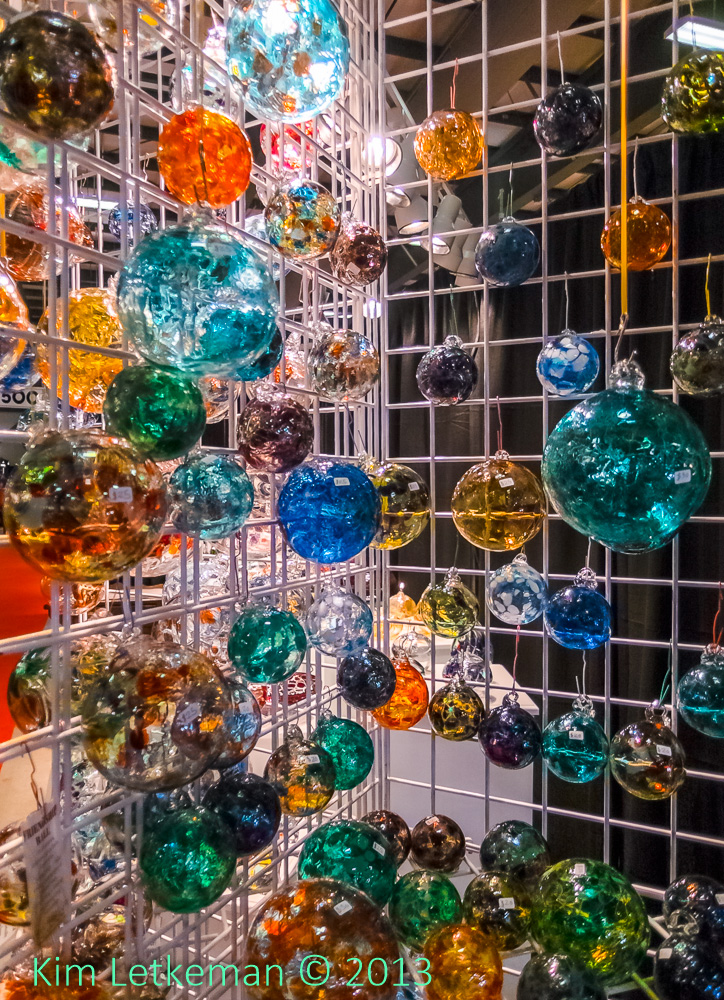
I just thought these colors were really pretty …
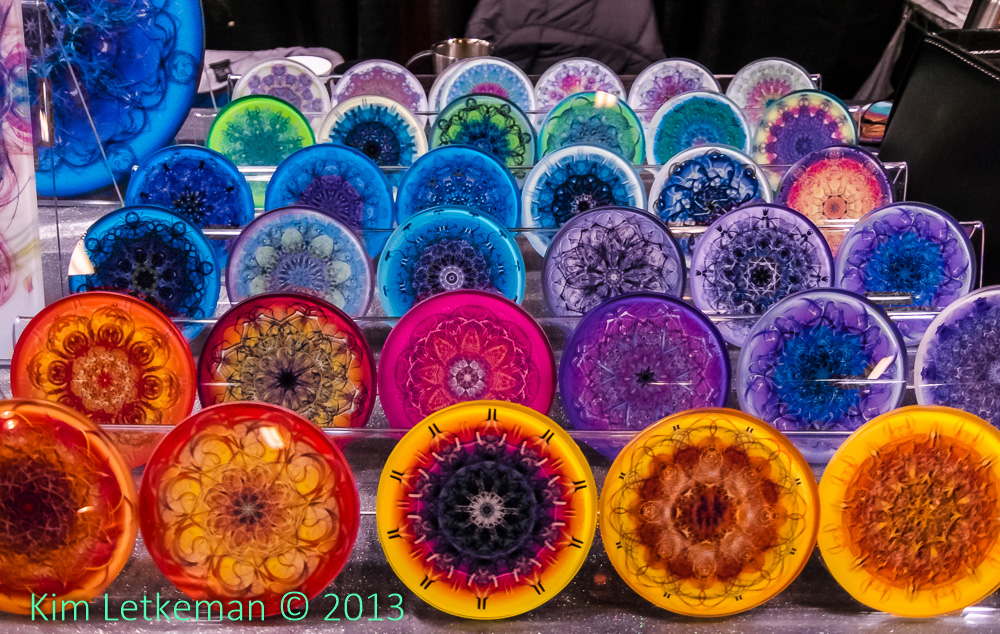
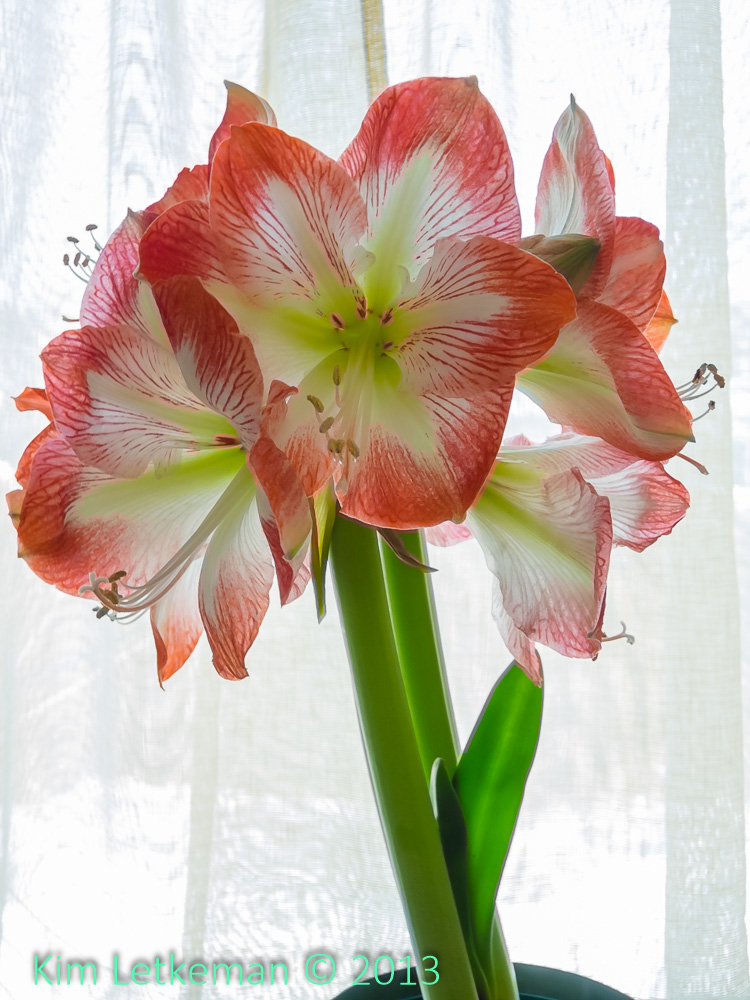
These too …

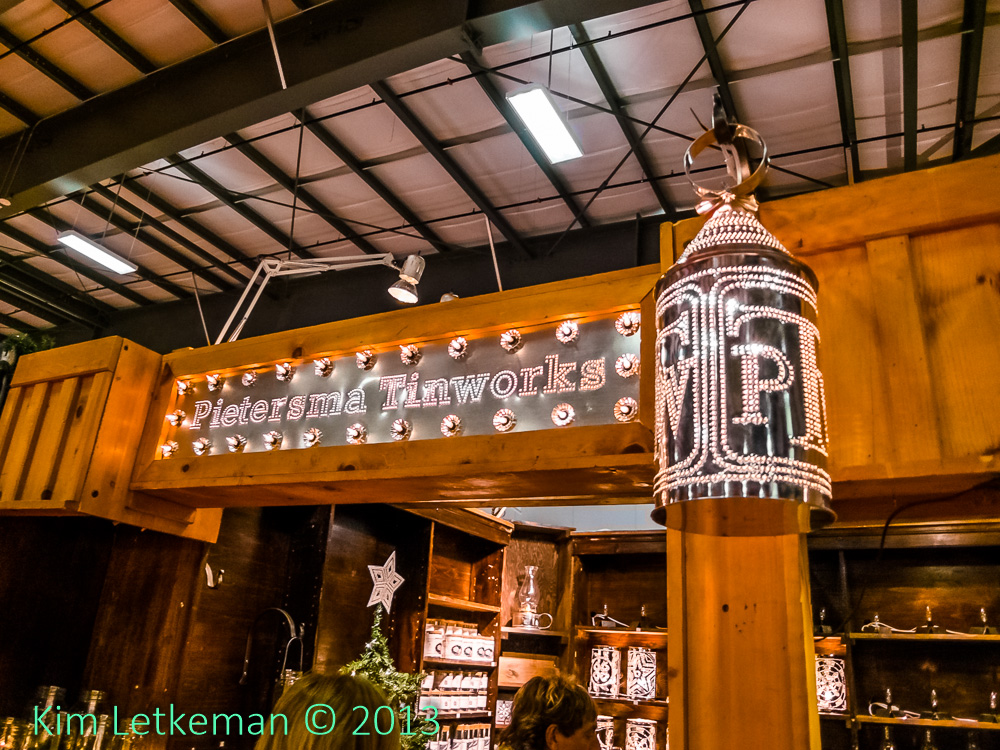
This tinsmith’s work will be familiar to those who read part 2 of this series, as I used the very bright lights in the lantern as a demonstration of CA. His goods were really impressive … but I love anything that throws lots of interesting light …

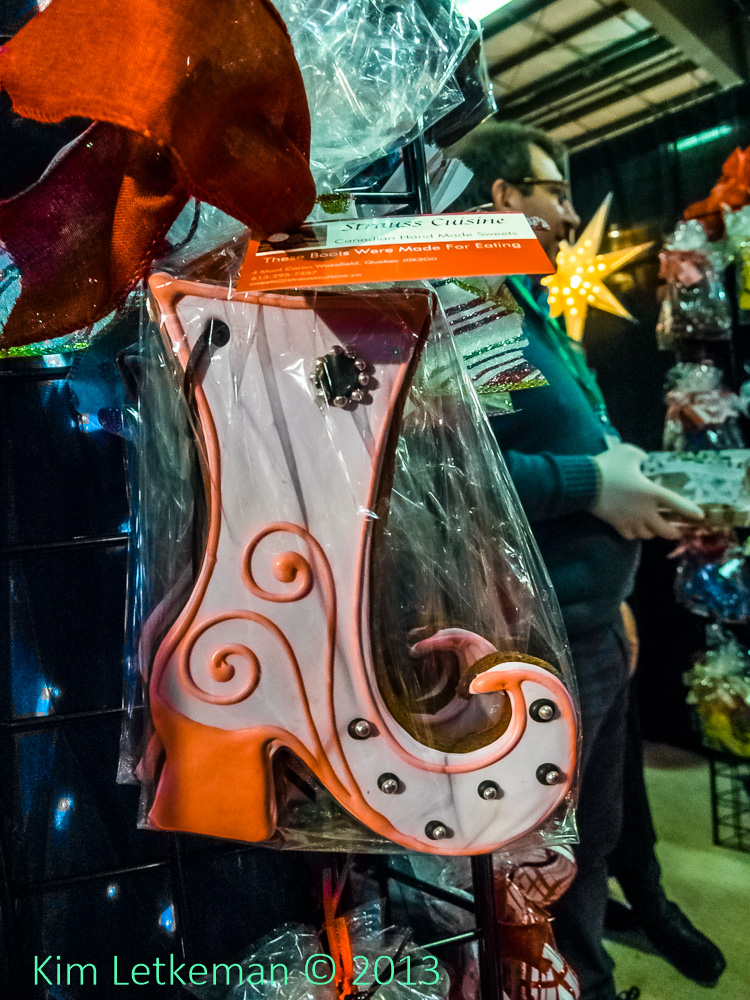
Edible boots for the confused food / foot fetishist …

On the way back, we popped into Boston Pizza for dinner, grabbing a bowl of French Onion Soup that was really very good.

I used Perfect Portrait 8 to process the shot of Karen in the bad restaurant lighting … this looks good for 2000 ISO …

Conclusion

Fun craft show. I bought several items including some impressive pumpkin pie jam :-) … I recommend you go if you happen to be in Ottawa. It’s worth the walk about.

The XQ1 was very pleasant to carry. I would have no problems popping it into a pocket and carrying it around. It feels smaller and has better performance than the F200EXR, although at low ISO I don’t think it is much better. We’ll see about that as the series goes on.