Tuesday, December 30, 2008

Neat Image 6 versus Topaz Denoise 2.1

I've been using Topaz Denoise for some of the trickier noise reduction tasks lately, as it does a wonderful job of smoothing surfaces while leaving very small details intact. An impressive piece of work.

But Neat Image, my favourite general purpose noise reduction tool, has released version 6, a major upgrade. That means that it is time to test these two against each other to see who will be my "go-to" tool.

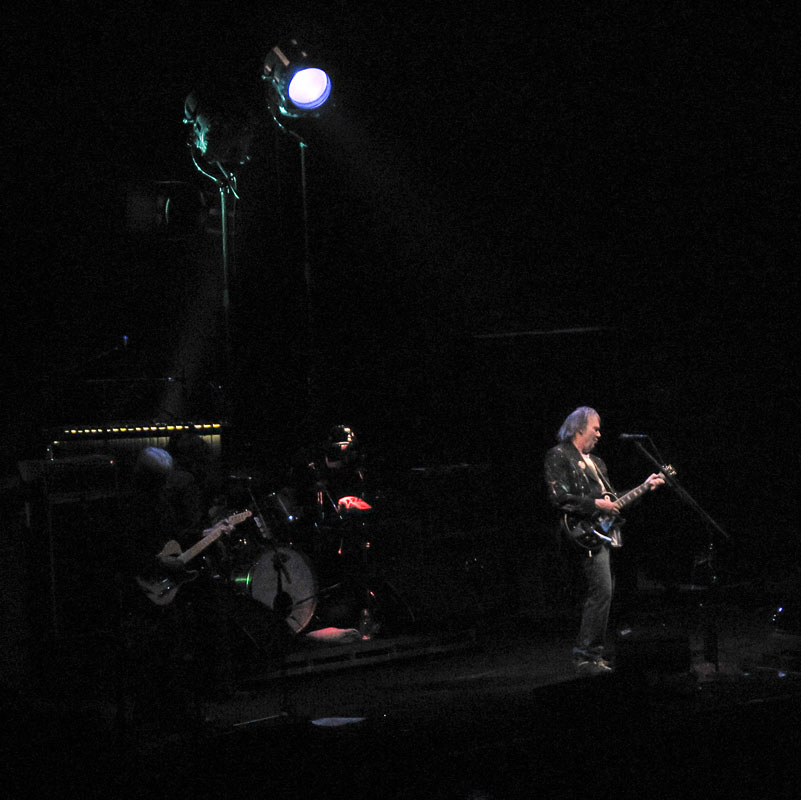
My initial tests with Neat Image were startlingly good, so I knew that I had to look at them pretty closely. I chose an image that I had done with Topaz Denoise in the past and that had blown me away with its ability to handle difficult shadow detail. This image was shot this spring at the Globe Theater in London, sometime during a performance of A Midsummer Night's Dream. This was a night performance and I had floor tickets (best value for 5 pounds in the Universe in my opinion.)

The Globe is all wooden beams and thatch, and the lighting is subdued. So I was forced to shoot at 2500 ISO to get decent shutter speeds. I used the D300 and 18-200VR, which resolves a lot of detail for a consumer mega-zoom. I took rather small crops from the middle of the frame and then processed one copy with Neat Image 6 in 16-bit mode in Adobe RGB color space. I processed the other copy with Topaz Denoise 2.1 under the same conditions.

First, here is the frame from which I took the crops. This is downsized only, no noise reduction at all. When you see the crops, you will be able to line them up with the scene near the middle of this image:


Neat Image took less than 10 seconds to complete its job while Topaz took the usual 6 minutes or so. The shocker is that the Neat Image is almost identical:


If I had any criticism of Neat Image, it would be that I could not remove the little artifacts it leaves behind. They look like mosquitoes, to quote Thom Hogan. But they are really tiny and do not show up when downsized (shown at the end.) I doubt they would show up on any normal print. So I forgive the tool.

I have two minor criticisms of Topaz Denoise. First, it is a little aggressive by nature and blurs things a bit more than I like. With more effort on tuning, I think I could have had less blur, but the tool is slow enough that it does not encourage much experimentation. Even a little hysteresis in the user interface would allow one to press a few buttons without the interminable recalculation time of the preview.

The second criticism is that Topaz likes to leave behind some fairly large textures where there is a lot of noise. It is fairly smooth texture, but is surprisingly large when compared with Neat Image's mosquitoes.

To be fair, when I upsized the crops and printed them together on a sull 8.5x11 sheet of gloss paper, I found that the images looked great, and the lack of grain really improved the overall look. Considering that these crops at 4x7 are the equivalent of posters, I was pretty pleased overall.

Here are the downsized crops, showing that the grain remains very visible in the original (as it does on the print), but that the other two look great. And the Neat Image version wins this by a nose in my opinion. Factor in the speed of Neat Image (at least 36 times faster) and it's more than a nose.


Neat Image can be purchased here. Topaz Denoise can be purchased here. I can see value in owning both. Some images just work better in Topaz Denoise, but I can see the need being fewer now that Neat Image 6.0 has been released. And note also that Neat Image 6 has a 64 bit plugin version. Unfortunately, it costs a little extra.

And for those who want to use Neat Image with device specific profiles, try this page. For those who shoot the Canon G10, my complete set of device specific profiles will appear shortly, I just created them and uploaded to Neat image a couple of days ago. They are designed to be used with ACR5 in 16-bit, Adobe RGB mode with no prior sharpening or NR. They do a great job. Of course, I also include a full set of jpegs in all sizes (except 640x480, which Neat Image cannot process) and all ISOs, including 3200.

Happy reducing ...

Sunday, December 28, 2008

Canon G10 Exposure Compensation Matrix

I shot a few images with the G10 at a Christmas Eve / Birthday celebration with family, and decided that I needed to spend some time experimenting with the G10's exposure compensation capabilities.

Let me be dead clear here ... this is a back light test for fill flash. This is not a "soften shadows in full sun" test for fill flash. I'll have to figure out how to do that one another time.
In this experiment, I shoot the G10 at a Scooby Doo doll for my subject, with no front lighting at all. The background is an industrial-looking corner of my basement that is lit overhead by a compact fluorescent bulb equivalent to approximately 100 watts. Being a modern bulb, it has a color temperature similar to that of a tungsten bulb. Which allowed me to gel the flash with CTO Orange (a small piece taped over the flash) and thus balance the foreground and background light.

I further balanced color temperature by setting WB in ACR5 on the letters on the Glad box on which Scooby is leaning. The first surprise was how much the color balance changes as the flash compensation changed. From very cool to very warm ... which means that this flash follows a color curve from warm at the start to cool at the end (I think) ... squelching early gives a warm color to the subject's light, which when balanced in ACR cools the whole scene. The color balance is perfect from 0ev onwards, but -1 and -2 cast warm light.

I created a 5x5 matrix of these images with the rows representing changes in ambient exposure and the columns representing changes in flash exposure. The G10 responded very well to this and gave me accurate exposures in every cell, judging by the changes from left to right and top to bottom. The only unpredictable occurence was the previously discussed color temperature change. (Double click to see the full image, click back to return.)


It is fairly obvious from looking at the matrix that the 5 most interesting images are the top half of the middle column and the left half of the middle row along with the center cell. I.e. there are five possible best exposures here.

The classic advice for shooting people in a room with fill flash is to drop ambient by 1 or 2 stops and then shoot TTL with flash. So let's look first at these to potential images.

Ambient -2 Flash 0


Ambient -1 Flash 0


Interestingly, the light output is almost perfectly balanced at -2/0 which can be seen by the lack of any shadows on the box on the foreground. The ambient casts an identical light to the fill ... and there is no change in color temperature either, indicating a pretty close match to the CTO Orange gel on the flash.

On the other hand, this also means that the ambient cannot drown out the flash shadows cast onto the background, and they too have equal intensity to ambient shadows. This can by seen on the wall on the right, where the ambient shadows to the right of the 2x4 studs comes from the fluorescent bulb, while the shadows from the working table and some of the junk on it hit the insulation with equal intensity. So this exposure might not be appropriate in this case. We really don't want unnatural shadows (i.e. flash shadows.)

Things get a bit better in the -1/0 shot, where the flash shadows have lost one stop of intensity (i.e. are 1/2 as bright.) They are visible, but becoming irrelevant. There is a slight ambient shadow now on the box in the foreground, which is actually quite accurate since the bulb is plainly visible. So this exposure is better in all ways than the previous one.

Now what about the 0/0 shot?

Ambient 0, Flash 0


Ambient light is now dominating. Flash shadows are almost gone (but not quite.) This is the best exposure yet.

The last two exposures that could perhaps eclipse this one would be the -1 and -2 flash exposures at 0 ambient. Here they are:

Ambient 0 Flash -1


Ambient 0 Flash -2


Well, both exhibit an unpleasant color shift, which could of course be warmed somewhat in ACR. But that would warm the subject as well, which might be inaccurate ... i.e. the flash no longer balances well with the ambient when the flash is gel'ed. It may, however, balance better without the gel, since it is coming up overly warm.

Anyway, there are no flash shadows in 0/-2 and barely perceptible flash shadows in 0/-1 where ambient light falls. The 0/-1 image has a nicely exposed subject, so I think I would prefer it every time over the 0/-2 image. The question is whether it looks better than the 0/0 image?

Well ... the overall colors and balance of shadows looks best to me in 0/0 ... but you may choose differently. My conclusion is that the G10 can be shot without gels when compensating the flash, but should have gels on when compensating only the ambient. For shooting at a party with lots of lamps about the place, I'd shoot with a gel on and set to 0,0 and tungsten WB or 0/-1 without gel and also set to tungsten. You might need to rebalance in ACR or equivalent, but if you like warm images then the jpegs will be fine from the cam.

My other conclusion is that the G10 mercifully responds perfectly to ambient compensation in matrix metering mode, so there is little need to play with other metering modes in most shooting situations.

Friday, December 12, 2008

The Moon Revisited -- Perigee Six Image Stack

I've written in the past about the moon, and my adventures in shooting and processing it. You can read those oldies here and here.

Tonight the moon is at its closest approach in quite some time. This perigee is only 118 miles further away than the closest approach in the last 375 years, so this has to qualify as a fairly big event. I noticed the incredible brightness of the moon (apparently 14% brighter than usual) as I drove home tonight. It's also a bit bigger in the sky, although that's rather hard to check :-)

I resolved to photograph it again tonight as I was driving, and right after wolfing down a bowl of cereal (dieting ... that's another story) I gathered my D300, 300mm F4 AFS, and my new Kenko 2x teleconverter. I have tested this teleconverter and found it to be a bit softer than my other one ... but there is more reach so I thought I'd give it a shot.

I wanted to do some fancy automated interval shots, but it was so bitterly cold outside that I chose instead to fire off 6 quick shots at 400 ISO with a high enough shutter speed that the 2 second timer should be enough to get crisp images. Since the shutter was way outside the danger zone (around 1/15s on a tripod), I did not need to deal with mirror slap. The timer handled only residual vibration from touching the camera to start the timer.

Once the six shots were done, I bolted back into the house to thaw my extremities and grabbed the memory card from the camera. I processed one of the images in ACR4 and tweaked it some in CS3 (local contrast, contrast and saturation.) Then downsize and sharpen. I think it came out very nicely.


Then, I thought I'd take all six images (the only images I shot, actually) and stack them. I used the command "file=>scripts=>load files in stack" to get all my RAW files (which had been converted with identical settings in ACR5) into separate layers. Then, I used the command "edit=>align layers" to get all the moons perfectly aligned.

Next, I reduced the opacity of all layers to about 50% and set all layers but the bottom to screen blend. This effectively multiplies only pixels that exist to make them brighter, but cancels random noise, since it will rarely appear in the same place in any two frames. I added a black layer at the bottom of the stack to serve as background, which also helped a great deal in cleaning up the sky.

The screen blends managed to make the moon too bright and the gamma too weak (low contrast), so I added an "exposure" adjustment layer and brought the moon back out with stronger gamma, which began to really accentuate detail.

Next, I performed local contrast work, adjusted the saturation and contrast, and downsized with some sharpening. I should have sharpened more here (the Kenko 2x is a bit soft with this lense) but I saved as jpeg and closed everything up. I was not satisfied when I looked at it in the browser so I committed heresy and loaded the jpg back up into ACR5. Here, I cranked the sharpening pretty hard and much preferred the new look, so that is what I posted. Here is that 6 shot stack:


Unless I am hallucinating, the detail came out really clearly. Looking closely, it has an almost 3D appearance, which is nice on full moon. In my opinion, nothing can really compare with Michael Stecker's image, but this is still a very satisfying result.

Edit: I processed an image from the Fuji Talk Forum taken by an S1000fs ... a nice capture, but suffering from serious jpeg compression artifacts. So much so that there was nothing I could do to keep them from showing in the final image. However, while trying different techniques, I notices that Topaz Denoise was able to smooth the image dramatically and this allowed a lot of extra color information to come out. So I thought perhaps that I could try the same thing on one of these images. Turns out it didn't work ... at 400 ISO the D300 doesn't produce enough noise for Topaz to even see. However, I then thought I'd try Topaz Adjust and let it play with the color. I used the preset "mild color pop" and did it ever! This is nothing compared with Michael's image linked above, but it it getting very interesting nonetheless ...

Saturday, December 6, 2008

Canon G10 ... High ISO is pretty good!

Well, I am pretty happy with the Canon G10. I much prefer its output to that of the Fuji F11 except under very limited circumstances, mainly 1600ISO. And even then, the G10 can be made to look not horrible :-)

Now ... I could be suffering from a serious case of cognitive dissonance, after all ... the G10 has tiny photosites and cannot possibly shoot at high ISO. It certainly can't successfully compete against the any member of the venerable Fujifilm Finepix Fxx series of cameras, can it? Well ... so far I think it's doing pretty well. My concert images are pretty decent when you consider that I shot from farther away than at any time with my Fuji F11.

So, to rid myself forever of this post-purchase rationalization, I decided that a formal test in bad light was needed. I have not done one of these in a while ... the first round of these was several years ago to convince myself that the D70s could defeat the F11. Well, that was pretty easy of course, as the larger sensor maintained much nicer tone as ISO rose.

But the G10 pixels are far smaller ... I think they are something like 2 square microns or something ridiculous. Anyway, a test was needed to rid my self of the nagging doubt. Interestingly, I shot a few real world images at 800 ISO last night, leaving a local restaurant. And I was thrilled with the results ... this can is really, really fun to shoot with and the results are wonderful, as shown in these two images.


You'd think that would be enough, wouldn't you :-)

Anyway, I shot two series of images and produced a set of crops from one, and a set of images form the other. The crops come from an image of a little Scooby Do doll hanging from my basement wall. There is texture in his collar and in his ear that is very instructive as ISO rises. I made a large image with crops at all ISOs from both spots, and the Canon performs surprisingly well. I favour detail retention over smoothness, and the Canon does not disappoint.

Here are those crops:


Once sharpening is equalized (detail can never quite be equalized, the Canon is overpowering), I find the Canon much smoother at all ISOs. It also holds details longer than the Fuji, still showing quite a bit of detail in the collar at 800 ISO. The Fuji has mostly wiped out the detail at 800 with its NR, and remember that the F11 has the least aggressive noise reduction in the Fxx series.

Now, there is also the overall look to consider. If one wants to shoot and directly print in social situations, the F11 does retain better saturation at 1600 ISO. This is unquestionably. Along with its inherent smoothness, it has quite the advantage out of camera. But those who reel off a series of images like that are either going to post a serious memory or blast them onto their facebook account.

The former case requires some attention to detail with processing (in my opinion) and so the Canon gets a chance to equalize. The latter simply doesn't matter. The vast majority of facebook images are awful technically anyway.

So can the Canon G10 equal the Fuji F11 at 1600 ISO? Well, judge for yourself. These three images are the F11 at 1600 ISO, the G10 at 1600 ISO, and the same G10 shot with some extra processing to mitigate its weaknesses.


The greens are much better on the Fuji, even after processing. But the reds are better on the Canon, and it would take a bit of work to get the Fuji to have decent reds on every shot. So ... a tie? I do have to admit that the Fuji image is warmer than both the Canon images, so some will favour the Fuji.

Perhaps we should take a quick peek at the low ISO images in this series. That might be instructive. F11 first, G10 second.


This was pretty much how they came out of the cameras, and the Canon was much better. In every way ... warmth, color, detail, acuity. I also find the Canon superior in all ways while shooting, and since I prefer its image quality from 80 through 800 ISO and I don't mind its 1600 ISO once I've processed it, there is really no contest here.

I declare the G10 superior to the Fxx series for me. That last part means that this is my judgment based on what matters to me and my interpretation of these images and how much more pleasant and functional the camera is in the hand (the difference is so dramatic that I have no words for it.) The album with all the shots is here, although you've seen most of it in this blog. But it is easier to compare there I think.

Now, for those who might vilify my test or my conclusions ... spare me. Test the G10 yourself ... you'll be very pleasantly surprised once you've shot with it for a while. You'll never want to shoot with an under-featured compact again.

And that resolution ... whoah ....

Wednesday, December 3, 2008

Neil Young in Ottawa ... Spectacular Concert!

Wow ... if you have not seen Neil Young on his latest tour, you really ought to take a look. He is in amazing form, and the voice is intact, something that cannot be said of every band that finds its way here. James Blunt was not quite up to form, although the concert was still well worth the admission. But Neil sounds like he always has, and like his CDs. But these versions of the songs still have a unique feel to them ... which is what makes it all so worth while. Neil rocks like a young man by the way ...

He did a lot of the great songs people look forward to, although with something like 50 CDs to his credit, there is a lot to choose from. But we got some really great tunes like Powderfinger, Cortez the Killer, Harvest, Unknown Legend, Old Man and he even closed with Rocking in the Free World! His encore was a brilliant version of the Beatles' A Day in the Life. People left on cloud 9.

Now, the price is very stiff for this tour. Two tickets well over 100 feet away will set you back at least $500 cad after taxes etc. I had no plans to go, but a little luck struck about 4 hours before the concert, when a coworker posted the need to unload a pair of tickets for half price ... needless to say I needed no further encouragement.

I brought my new Canon G10, which I decided I much prefer shooting over the Fuji F11, despite the Canon being weak at the more useful ISOs of 800 and 1600. I use other tricks, like underexposing at lower ISO, etc. It works well enough and the camera is a joy to use. And note that I was even further away (but only by 20 or 30 feet) than I was at James Blunt a few days before.

Neil had strict rules regarding photos and recording. None whatsoever would be permitted, as is plainly written on the ticket.


Since I picked up the tickets at the arena, I was unaware of this and brought the camera anyway. The security people made a bit of a show of dragging people out of the concert, but in the end there were just too many small cameras for them to stop. Flashes went off constantly. I was careful, though, to keep the camera in my pocket and to only shoot a few images at a time, and very stealthily. No need to get kicked out of the greatest concert I've heard in a long time ...

By the way, the whole set it visible here, in my gallery.

As I mentioned, I was a long way off, and at an angle. So there is not a lot of ambient light in these images ... the backgrounds are dark, since the nicely lit stage is not behind Neil in most of these. But, as with James Blunt, the images serve nicely as memories of a great concert.

I did not arrive in time to hear Everest, the first opening band. But the second band, Wilco, was quite good. They sounded like Neil at times and like Blue Rodeo at times. Their unique twist was this cacophony they'd break into now and again, which is apparently their signature in live shows. Quite entertaining at times. I literally burst into laughter in one song, where the singers continued their country harmonies through an injection of noise from one of the guitarists and the drummer that sounded just like an air raid ... when it was over, the group was still singing this lovely mellow ballad. It happened three or four times in the song, and it worked really well.

Anyway, here's what they looked like. This is a heavy crop from a long way off, so don't expect the same quality as when I shot the Wallflowers from 10 feet with a dSLR :-)


And then, of course, Neil came on and took our breath away ...


If you enjoyed these, have a look at the rest of the album. And go see Neil Young if you can!